Yearly Archive April 24, 2025

Byjacquelyn

whirlpool wdp540hamz manual

The Whirlpool WDP540HAMZ is a high-efficiency dishwasher designed for superior cleaning performance. It offers quiet operation, multiple wash cycles, and advanced features for optimal dish care.

1.1 Overview of the Dishwasher Model

The Whirlpool WDP540HAMZ is a freestanding dishwasher designed for efficient and quiet operation. It features a spacious interior, multiple wash cycles, and advanced cleaning technology.

This model is known for its reliability and energy efficiency, making it a practical choice for modern kitchens. Its sleek design and robust construction ensure durability and long-lasting performance.

With a focus on user convenience, the WDP540HAMZ offers customizable settings and smart features to handle various dishwashing needs effectively. It is an ideal appliance for households seeking a balance between power and eco-friendliness.

1.2 Key Features and Benefits

The Whirlpool WDP540HAMZ dishwasher offers a range of innovative features designed to enhance cleaning efficiency and user convenience.

Key features include multiple wash cycles, quiet operation, and energy-saving modes. It also boasts a large interior capacity, adjustable racks, and advanced drying technology for spotless results.

  • Quiet operation ensures minimal noise during cycles.
  • Energy-efficient design reduces water and electricity consumption.
  • Advanced sensors optimize water temperature and detergent use.
  • Customizable settings allow tailored wash cycles for different needs.

These features make it an ideal choice for modern households seeking reliability and performance.

1.3 Importance of the Manual

The manual for the Whirlpool WDP540HAMZ dishwasher is a comprehensive guide essential for understanding its features, proper usage, and maintenance.

It provides detailed instructions for installation, operation, and troubleshooting, ensuring users can maximize the appliance’s performance and longevity. Additionally, it outlines safety precautions and warranty information, protecting both the user and the product. By following the manual, users can avoid potential issues, optimize energy efficiency, and maintain the dishwasher’s optimal functioning. It serves as a valuable resource for resolving common problems and ensuring the appliance operates as intended; Regularly referencing the manual helps users get the most out of their dishwasher.

  • Essential for proper installation and setup.
  • Ensures safe and efficient operation.
  • Provides troubleshooting solutions.
  • Details warranty and maintenance requirements.

Installation and Setup

Proper installation ensures safe and efficient operation. Follow manual guidelines for electrical, plumbing, and leveling. Secure the dishwasher to prevent movement during operation.

2.1 Pre-Installation Requirements

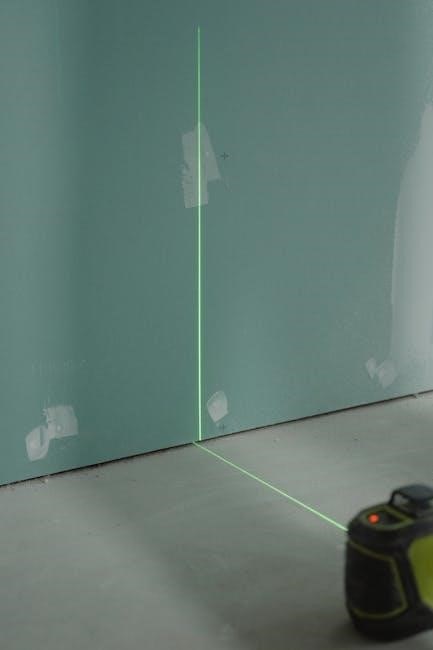
Before installing the Whirlpool WDP540HAMZ, ensure the area is clear and level. Check electrical and plumbing connections for compatibility. Verify water supply lines, drainage, and power sources are accessible. Measure the space to confirm proper fit. Ensure the floor is sturdy and can support the dishwasher’s weight. Familiarize yourself with local building codes and safety guidelines. Gather all necessary tools and materials as listed in the manual. Proper preparation ensures a smooth installation process and optimal performance. Always follow the manufacturer’s instructions to avoid installation issues.

2.2 Step-by-Step Installation Guide

Follow the manual’s guidance for a seamless installation. Begin by carefully unpacking the dishwasher and inspecting for damage. Position the unit in its designated space, ensuring proper alignment with surrounding cabinets. Secure the dishwasher to the countertop using the provided brackets to prevent movement. Connect the water supply lines to the appropriate valves, ensuring tight seals to avoid leaks. Attach the drainage hose to the garbage disposal or standpipe, maintaining the recommended height. Plug the dishwasher into a grounded electrical outlet, adhering to local wiring regulations. Level the appliance by adjusting the legs and use shims if necessary for stability. Complete the installation by testing the dishwasher with a short cycle to ensure proper function. Always refer to the manual for specific instructions tailored to your model.

2.3 Electrical and Plumbing Connections

Ensure the dishwasher is properly connected to both electrical and plumbing systems. For electrical connections, use a dedicated 120V, 60Hz grounded outlet. Avoid shared circuits to prevent power issues. Plumbing requires a 3/8″ water supply line connected to a shut-off valve. Install a water inlet hose with a filter to prevent debris clogs. The drainage hose must be secured to the garbage disposal or standpipe, maintaining the recommended elevation to avoid siphoning. Tighten all connections firmly to prevent leaks. Refer to the manual for specific torque specifications and safety guidelines to ensure a secure setup. Always test connections before first use.

Operating the Dishwasher

Load dishes properly, add detergent and rinse aid, select the appropriate cycle, and start the dishwasher. Ensure all settings are configured for optimal cleaning performance.

3.1 Loading the Dishwasher Correctly

To ensure optimal cleaning, load dishes facing the center, secure utensils, and avoid blocking the spray arms. Place larger items at the bottom and smaller ones on the top rack. Avoid overcrowding, as this can reduce cleaning efficiency. Proper arrangement prevents food particles from redepositing and ensures water and detergent flow evenly. Improper loading may lead to poor cleaning results or damage to items. Always refer to the manual for specific loading recommendations and diagrams for your Whirlpool WDP540HAMZ model to achieve the best performance.

3.2 Adding Detergent and Rinse Aid

Add detergent to the designated compartment in the dishwasher door. Use the recommended amount based on the cycle and water hardness. For optimal results, use a high-quality dishwasher detergent. The rinse aid dispenser is typically located near the detergent compartment. Fill it as indicated, ensuring proper drying performance. Adjust the rinse aid level if water spots persist. Always refer to the manual for specific guidelines on detergent and rinse aid usage for your Whirlpool WDP540HAMZ model. Proper levels ensure cleaner dishes and prevent residue buildup during the wash cycle.

3.3 Selecting the Right Cycle and Options

Consult the manual to choose the ideal cycle for your load. The Whirlpool WDP540HAMZ offers options like Heavy Duty, Normal, and Light/China cycles. Select additional features such as Delay Start, Sanitize, or Steam Cleaning based on your needs. For heavily soiled dishes, use the Pots and Pans option. Adjust settings like water temperature and drying options for optimal results; Always match the cycle to the load size and soil level for efficient cleaning. Proper cycle selection ensures dishes are cleaned thoroughly while maintaining energy efficiency. Refer to the cycle guide in the manual for detailed descriptions and recommendations.

3.4 Starting the Dishwasher

Once loaded and configured, ensure the dishwasher door is securely closed. Select the desired cycle and options using the control panel. Press the Start button to begin the cycle. The dishwasher will automatically lock the door and initiate the selected program. The display will show the remaining time and current stage. If needed, you can pause or cancel the cycle using the controls. Always refer to the manual for specific start-up procedures and troubleshooting tips. Proper operation ensures efficient cleaning and longevity of the appliance.

Cycle and Option Guide

This guide outlines the dishwasher’s cycles and customizable options. Choose from heavy-duty, normal, or eco-mode. Options include heat dry, delay start, and sanitize. Customize settings for optimal results.

4.1 List of Available Cycles

The Whirlpool WDP540HAMZ dishwasher offers a variety of cycles tailored to different cleaning needs. These include Heavy Duty for tough messes, Normal for everyday cleaning, EcoMode for energy efficiency, Quick Wash for faster cleaning, and Sanitize for enhanced hygiene. Each cycle is designed to provide optimal results based on the load’s requirements. Additionally, users can customize settings like delay start, heat dry, and steam cleaning to further enhance performance. This range of cycles ensures efficient and tailored cleaning for various dishware and food residue scenarios.

4.2 Description of Each Cycle

The Whirlpool WDP540HAMZ dishwasher features distinct cycles tailored for specific cleaning needs. The Heavy Duty cycle tackles heavily soiled dishes with intense water jets and higher temperatures. The Normal cycle is ideal for everyday loads, balancing efficiency and effectiveness. EcoMode prioritizes energy savings with lower water and energy consumption. The Quick Wash cycle cleans lightly soiled dishes rapidly, saving time. The Sanitize cycle ensures dishes are hygienically cleaned with high-temperature rinses. Each cycle is designed to address different dishware and food residue scenarios, providing flexibility and optimal cleaning results. This variety ensures users can choose the perfect cycle for their needs.

4.3 Customizing Wash Options

The Whirlpool WDP540HAMZ dishwasher allows users to tailor wash settings to specific needs. Options include adjusting water temperature, enabling Heated Dry for improved drying, or activating Sanitize for enhanced hygiene. The Delay Start feature schedules wash cycles up to 24 hours in advance, offering convenience. Users can also combine cycles with additional options like Pots and Pans for tougher messes or Light/China for delicate items. Customization ensures optimal cleaning while addressing various dishware types and food residue levels, providing flexibility for different household needs. This feature-rich design enhances efficiency and personalization in dishwashing routines.

Maintenance and Care

Regularly clean the filter and check for blockages. Ensure proper detergent and rinse aid usage for optimal performance and maintain the interior.

5.1 Regular Cleaning and Filter Maintenance

Regular cleaning and filter maintenance are essential for optimal performance. Clean the filter regularly to ensure water flows freely and dishes are cleaned properly. Check and remove food particles from the filter after each use. Wipe down the interior and exterior to prevent grease buildup. Ensure detergent and rinse aid levels are adequate. Run a cleaning cycle or hot water rinse periodically to maintain hygiene. Proper maintenance prevents odors and ensures efficient operation. Refer to the manual for detailed cleaning instructions and recommendations.

5.2 Troubleshooting Common Issues

If your dishwasher isn’t performing as expected, check for common issues. Ensure the power supply is stable and the door is properly closed. If error codes appear, refer to the manual for solutions. Poor cleaning results may indicate incorrect detergent dosage or a clogged filter. Check for blockages in spray arms or food particles in the filter. If the dishwasher doesn’t start, verify cycle selection and child lock status. Regularly cleaning the filter and ensuring proper detergent use can prevent many issues. Consult the troubleshooting guide in the manual for detailed solutions to specific problems.

5.3 Dishwasher Detergent and Rinse Aid Tips

For optimal performance, use high-quality dishwasher detergent specifically designed for automatic dishwashers. Measure detergent according to the manual’s guidelines to avoid overuse, which can leave residue. Ensure the detergent dispenser is clean and free of clogs. For rinse aid, adjust the dispenser level based on water hardness and drying needs. Using the correct amount prevents water spots and ensures sparkling dishes. Regularly clean the detergent and rinse aid dispensers to maintain efficiency. Always store detergent and rinse aid in a dry place to preserve effectiveness. Refer to the manual for specific recommendations tailored to your model.

Safety Precautions

Always follow safety guidelines to ensure safe operation. Keep children away during operation and avoid hot surfaces. Proper installation and maintenance are crucial for preventing hazards.

6.1 General Safety Guidelines

For safe operation, always read the manual before using the dishwasher. Ensure children stay away during operation and avoid touching hot surfaces. Keep the dishwasher door closed during cycles to prevent accidents. Never lean or sit on the appliance, as it may tip over. Avoid overloading dishes, as this can cause imbalance. Always unplug the dishwasher before performing maintenance. Keep flammable materials away from the dishwasher. Follow all electrical safety precautions to prevent shocks or fires. Regularly inspect hoses and connections for leaks or damage. Proper installation and leveling are essential for safe and efficient operation.

6.2 Child Safety Features

The Whirlpool WDP540HAMZ dishwasher includes child safety features to prevent accidents. The control panel can be locked to avoid accidental start or changes during operation. Secure latches ensure the door remains closed, preventing children from accessing hot dishes or interfering with the cycle. Parents are advised to supervise children near the appliance and teach them to respect its operation. These features help create a safer kitchen environment, reducing the risk of injury or unintended use. Regularly check the door locks and latches to ensure proper function. Always store detergent and rinse aid out of children’s reach to avoid ingestion.

6.3 Avoiding Potential Hazards

To ensure safe operation, avoid overloading the dishwasher, as this may cause imbalance during cycles. Keep sharp objects like knives and glassware in secure positions to prevent breakage or injury. Avoid using abrasive cleaners or scouring pads, as they can damage surfaces. Never leave the dishwasher unattended during operation, especially when children are nearby. Always follow the recommended detergent and rinse aid quantities to prevent excessive sudsing or residue buildup. Regularly inspect and maintain the dishwasher’s filters and drains to avoid clogs and poor performance. Ensure proper ventilation in the kitchen to prevent moisture buildup, which can lead to mold or mildew growth.

Energy Efficiency and Eco-Friendly Features

The Whirlpool WDP540HAMZ is Energy Star certified, featuring an eco-mode and advanced water-sensing technology to minimize energy and water consumption, ensuring efficient and quiet operation.

7.1 Energy Guide and Ratings

The Whirlpool WDP540HAMZ dishwasher is Energy Star certified, ensuring it meets energy efficiency standards set by the U.S. Environmental Protection Agency. With an estimated 290 kWh of energy consumption per year, it is designed to minimize energy use while delivering superior cleaning performance. The dishwasher features an eco-mode that further reduces energy and water consumption during cycles. Its quiet operation and advanced sensors optimize water and energy usage, making it an environmentally friendly choice for households. This model is rated highly for its energy efficiency, providing long-term savings on utility bills while maintaining reliable performance.

7.2 Eco-Mode and Energy-Saving Tips

The Whirlpool WDP540HAMZ features an Eco-Mode that reduces energy and water consumption during cycles, making it ideal for environmentally conscious users. To maximize efficiency, run full loads to minimize the number of cycles. Using eco-friendly detergent and ensuring proper loading can also enhance performance. Regular filter cleaning and maintenance are recommended to maintain optimal efficiency. Additionally, selecting the Eco-Mode for lightly soiled dishes can save energy without compromising cleaning results. These tips help users reduce their environmental impact while enjoying reliable performance.

7.3 Water and Energy Consumption Details

The Whirlpool WDP540HAMZ dishwasher is designed to be energy and water efficient, consuming approximately 3.5 gallons of water per cycle. It holds an ENERGY STAR certification, indicating low energy consumption. The dishwasher uses advanced sensors to optimize water and energy usage based on load size and soil level. On average, it consumes 270 kWh of energy per year, making it an eco-friendly choice for households; These specifications ensure minimal environmental impact while maintaining superior cleaning performance. The manual provides detailed charts for energy and water usage across different cycles, helping users make informed decisions.

Dimensions and Space Requirements

The Whirlpool WDP540HAMZ dishwasher is designed to be energy and water efficient, consuming approximately 3.5 gallons of water per cycle. It holds an ENERGY STAR certification, indicating low energy consumption. The dishwasher uses advanced sensors to optimize water and energy usage based on load size and soil level. On average, it consumes 270 kWh of energy per year, making it an eco-friendly choice for households. These specifications ensure minimal environmental impact while maintaining superior cleaning performance. The manual provides detailed charts for energy and water usage across different cycles, helping users make informed decisions.

8.1 Exterior and Interior Dimensions

The Whirlpool WDP540HAMZ dishwasher is designed to fit seamlessly into standard kitchen spaces. Its exterior dimensions are 33.75 inches in height, 23.75 inches in width, and 24 inches in depth, making it a compact yet efficient appliance. The interior features a spacious tub with a tall tub design, offering ample room for dishes. The dishwasher includes adjustable racks and a third-level rack for maximum loading flexibility. These dimensions ensure easy installation in most kitchen layouts while providing generous interior capacity for optimal dish cleaning. The manual provides detailed diagrams to help users visualize the space requirements.

8.2 Space-Saving Design Features

The Whirlpool WDP540HAMZ dishwasher is built with a space-saving design to fit seamlessly into compact kitchens. Its slim profile and compact exterior allow for easy installation in tight spaces. The tall tub interior maximizes capacity without increasing the exterior footprint. Adjustable racks and a third-level rack provide flexible loading options, ensuring efficient use of space. The dishwasher also features foldable tines and utensil holders to accommodate dishes of various sizes. This design ensures optimal performance while maintaining a sleek, space-efficient profile, making it ideal for modern kitchens with limited space.

8.3 Installation Clearance Requirements

Proper clearance is essential for the Whirlpool WDP540HAMZ dishwasher to ensure safe and efficient operation. The unit requires minimum clearance of 1 inch on the top and sides for proper airflow and heat dissipation. The rear must have at least 1 inch of clearance to accommodate plumbing and electrical connections. Ensure the floor is level and sturdy to support the dishwasher’s weight. Additionally, maintain at least 2 inches of space between the dishwasher and adjacent surfaces to prevent damage from heat or moisture. Always refer to the manual for specific installation guidelines to guarantee a secure and proper fit.

Warranty and Support

The Whirlpool WDP540HAMZ dishwasher comes with a warranty, ensuring coverage for parts and labor. For support, contact their customer service or visit the official website for resources, including online manuals and support forms.

9.1 Warranty Information and Coverage

The Whirlpool WDP540HAMZ dishwasher is backed by a comprehensive warranty program. This includes coverage for parts and labor, ensuring protection against manufacturing defects. The warranty period varies depending on the components, with key parts like the motor and tub typically covered for extended durations. Registration is often required to activate the warranty, and proper installation as per the manual is essential for coverage validity. For detailed terms and conditions, refer to the warranty section in the manual or visit Whirlpool’s official website. This ensures you understand what is covered and for how long.

9.2 Contacting Customer Support

For assistance with your Whirlpool WDP540HAMZ dishwasher, customer support is readily available. You can contact them via phone, email, or through the official Whirlpool website. Live chat is also an option for quick inquiries. The support team is equipped to address installation, operation, and maintenance questions, as well as warranty-related concerns. Be prepared to provide your dishwasher’s model number and serial number for efficient service. Support hours and contact details can be found in the manual or on the Whirlpool website. This ensures you receive prompt and accurate assistance whenever needed.

9.3 Online Resources and Manuals

The Whirlpool WDP540HAMZ manual and additional resources are available online for easy access. You can download the PDF manual free of charge, which includes detailed instructions for installation, operation, and maintenance. The official Whirlpool website also offers supplementary guides, such as the cycle guide, dimension guide, and installation instructions. These resources provide comprehensive information to help you understand and utilize your dishwasher effectively. For troubleshooting or specific queries, the manual and online support pages are indispensable tools to ensure optimal performance and address any concerns promptly.

Additional Resources

The Whirlpool WDP540HAMZ manual is complemented by supplementary guides, including the cycle guide, dimension guide, and energy guide, all accessible on the official Whirlpool website.

10.1 Owners Manual andcycle Guide

10.1 Owners Manual and Cycle Guide

The Whirlpool WDP540HAMZ Owner’s Manual provides comprehensive instructions for installation, operation, and maintenance. It includes a detailed cycle guide, helping users understand each wash option, from heavy-duty cycles to eco-mode. The manual ensures optimal performance by explaining detergent usage, load sizes, and customization options. Available online, it serves as a quick reference for troubleshooting and maximizing the dishwasher’s efficiency. Regular updates ensure users have the latest information for their appliance. This guide is essential for both new and experienced users to make the most of their Whirlpool dishwasher’s features.

10.2 Dimension Guide

The Dimension Guide provides precise measurements for the Whirlpool WDP540HAMZ dishwasher, ensuring proper fit in your kitchen. It includes exterior and interior dimensions, such as height, width, and depth. This guide helps with installation planning, especially for built-in or integrated setups. Detailed diagrams illustrate door clearance and spacing requirements; Understanding these dimensions ensures the dishwasher fits seamlessly into your kitchen layout without obstructing movement or other appliances. This section is essential for installers and homeowners to plan accurately, avoiding measurement errors during setup.

10.3 Energy Guide

The Energy Guide provides detailed information about the Whirlpool WDP540HAMZ dishwasher’s energy efficiency and consumption. It includes ENERGY STAR certification details, energy ratings, and water usage per cycle. This section helps users understand the dishwasher’s environmental impact and operational costs. The guide also highlights eco-friendly features like the Eco-Mode, which reduces energy and water consumption. By referencing this guide, users can make informed decisions about their energy usage and optimize the dishwasher’s performance while minimizing environmental impact. This information is crucial for eco-conscious homeowners seeking to balance efficiency and cost-effectiveness.

10.4 Installation Instructions

The Installation Instructions section of the Whirlpool WDP540HAMZ manual provides a step-by-step guide for proper dishwasher setup. It covers site preparation, leveling, and securing the appliance. Detailed diagrams and descriptions ensure accurate electrical, water supply, and drainage connections. The guide emphasizes safety precautions, such as disconnecting power before installation. Additionally, it outlines clearance requirements and mounting procedures to prevent vibration and noise. By following these instructions, users can ensure a secure and functional installation, optimizing performance and longevity of the dishwasher. This section is essential for homeowners or installers to achieve a professional-grade setup. Always refer to the manual for specific details.

Registration and Activation

Registering your Whirlpool WDP540HAMZ dishwasher activates warranty benefits and provides access to exclusive support services and updates. Visit the official website to complete the process.

11.1 Registering Your Dishwasher

Registering your Whirlpool WDP540HAMZ dishwasher is a straightforward process that ensures you receive warranty benefits and product updates. Visit the official Whirlpool website and navigate to the registration section. Create an account or log in if you already have one. Enter your dishwasher’s model number, serial number, and purchase details. Ensure all information is accurate to avoid delays. Once registered, you’ll receive a confirmation email. This step is essential for activating warranty services and accessing exclusive customer support. Registration also helps Whirlpool provide tailored assistance and maintain accurate records of your appliance.

11.2 Activating Warranty and Support

Activating the warranty for your Whirlpool WDP540HAMZ dishwasher ensures you receive coverage for repairs and maintenance. To activate, visit the Whirlpool official website and log into your account. Navigate to the warranty activation section and enter your dishwasher’s serial number, purchase date, and other required details. Once submitted, your warranty will be validated, providing protection against manufacturing defects. Activation also grants access to dedicated customer support, including troubleshooting and service scheduling. Ensure all information is accurate to avoid delays. Activation is typically required within a specified timeframe from purchase to maintain warranty eligibility.

11.3 Benefits of Registration

Registering your Whirlpool WDP540HAMZ dishwasher provides several benefits, including access to exclusive content, personalized support, and priority service. Registered users receive notifications about software updates, maintenance tips, and special promotions. Registration also ensures warranty validation and streamlines the process for scheduling repairs or requesting assistance. Additionally, it allows Whirlpool to tailor communications, offering relevant advice for optimal appliance performance. Registration is a simple process that enhances your ownership experience, ensuring you maximize the features and longevity of your dishwasher.

Byjacquelyn

tardive dyskinesia fact sheet pdf

Tardive dyskinesia (TD) is a movement disorder caused by long-term use of antipsychotic medications. It involves involuntary, repetitive facial and body movements, often irreversible. Tardive dyskinesia fact sheet pdf provides essential information on symptoms, causes, and management strategies for patients and caregivers.

1.1 Definition and Overview

Tardive dyskinesia (TD) is a neurological disorder characterized by involuntary, repetitive movements, often affecting the face, tongue, and limbs. It typically develops after prolonged use of antipsychotic medications, which disrupt dopamine activity in the brain. TD can manifest as lip smacking, tongue protrusion, or limb tremors, and in some cases, it may be irreversible. The condition is a significant side effect of long-term psychiatric treatment, impacting quality of life and requiring careful management.

1.2 Importance of Understanding Tardive Dyskinesia

Understanding tardive dyskinesia is crucial for early detection and effective management. It often results from long-term antipsychotic use, making it a significant concern in mental health care. Recognizing TD’s symptoms and risk factors enables healthcare providers to adjust treatments and minimize complications. Patients and caregivers benefit from awareness, as it fosters better communication with clinicians and improves quality of life. Education and advocacy are key to addressing this complex condition and ensuring optimal patient outcomes.

Causes and Risk Factors

Tardive dyskinesia primarily stems from long-term antipsychotic use, especially first-generation drugs. Prolonged dopamine blockade disrupts brain chemistry, increasing TD risk. Factors like medication type and duration elevate susceptibility.

2.1 Role of Antipsychotic Medications

Antipsychotic medications, particularly first-generation drugs, are the primary cause of TD. Long-term use disrupts dopamine pathways, leading to involuntary movements. While second-generation antipsychotics carry a lower risk, they are not risk-free. Dosage and treatment duration significantly influence TD development. Understanding this relationship is crucial for minimizing TD prevalence and improving patient outcomes through informed medication strategies.

2.2 Long-Term Use of Typical Antipsychotics

Long-term use of typical antipsychotics significantly increases the risk of TD due to prolonged dopamine receptor blockade. These medications disrupt brain chemistry, leading to uncontrollable movements. Studies show that extended use escalates the likelihood of developing irreversible symptoms. While second-generation antipsychotics carry a lower risk, typical antipsychotics remain a primary contributor to TD cases. This highlights the importance of careful medication management and regular monitoring to mitigate risks, as detailed in the tardive dyskinesia fact sheet pdf.

2.3 Risk Factors for Developing TD

Risk factors for TD include prolonged use of antipsychotics, higher doses, older age, and female gender. Underlying mental health conditions and certain medical histories also increase susceptibility. Studies suggest that individuals with diabetes or brain injuries are at higher risk. Additionally, African American descent and smoking have been linked to a greater likelihood of developing TD. Understanding these factors is crucial for early detection and prevention, as emphasized in the tardive dyskinesia fact sheet pdf.

Signs and Symptoms

Tardive dyskinesia is characterized by involuntary, repetitive movements, such as facial grimacing, tongue protrusion, and limb movements. These symptoms can significantly impact daily life and communication.

3.1 Characteristics of Involuntary Movements

Tardive dyskinesia involves involuntary, repetitive movements that are often rhythmic and uncontrollable. Common manifestations include facial grimacing, tongue protrusion, lip smacking, and choreoathetoid movements of the limbs. These movements can be mild or severe and may worsen during stress or voluntary actions. They are typically irreversible and can significantly impact a patient’s quality of life and social interactions.

The movements are often most noticeable in the face but can also affect the trunk and extremities. They are usually non-suppressible and may fluctuate in intensity over time.

3.2 Facial Grimacing and Other Common Symptoms

Facial grimacing is a hallmark symptom of tardive dyskinesia, often accompanied by tongue protrusion, lip smacking, and puckering. These movements are involuntary and can be distressing for patients. Other common symptoms include repetitive chewing motions, eyebrow raises, and facial twitches. The movements are typically rhythmic and may worsen with stress, anxiety, or voluntary movement.

These symptoms can significantly impact a patient’s social interactions and self-esteem, making early recognition and management crucial for improving quality of life.

Diagnosis and Assessment

Diagnosis involves clinical evaluation, patient history, and tools like the AIMS scale to assess involuntary movements and confirm TD accurately in patients.

4.1 How TD is Diagnosed

Diagnosis of TD involves a thorough clinical evaluation, including patient history and physical examination. The AIMS scale is commonly used to assess severity of involuntary movements. Symptoms such as facial grimacing, tongue protrusion, and limb movements are evaluated. A detailed medication history is essential to identify antipsychotic use as a potential cause. Ruling out other movement disorders ensures an accurate diagnosis, guiding appropriate management strategies for patients.

4.2 Use of AIMS (Abnormal Involuntary Movement Scale)

The AIMS scale is a standardized tool for assessing TD severity. It evaluates 12 body areas, rating movements from 0 (none) to 4 (severe). Facial and oral movements, limbs, and trunk are assessed. The scale helps clinicians monitor symptoms objectively, ensuring consistent documentation. Regular use of AIMS aids in tracking progression and response to treatment, providing a reliable measure for clinical decision-making and patient care.

4.3 Differential Diagnosis

Differential diagnosis is crucial to distinguish TD from other movement disorders. Conditions like dystonia, parkinsonism, and Huntington’s disease may present similarly. A thorough clinical evaluation, including patient history and physical exam, helps identify TD. Key factors include medication history, symptom onset, and characteristic involuntary movements. Ruling out other causes ensures accurate diagnosis and appropriate management. This process is vital for developing targeted treatment plans and improving patient outcomes.

Prevention Strategies

Prevention involves minimizing TD risk through careful medication selection and monitoring. Using second-generation antipsychotics and regular assessments can reduce the likelihood of developing TD.

5.1 Minimizing the Risk of Developing TD

Minimizing TD risk involves careful selection of antipsychotics, favoring second-generation drugs with lower risk profiles. Regular monitoring for early signs of TD, such as facial grimacing or tongue protrusion, is crucial. Adjusting dosages or switching medications at the first indication of symptoms can help prevent progression. Patient education and open communication between healthcare providers and patients are key to early intervention and effective management strategies.

5.2 Use of Second-Generation Antipsychotics

Second-generation antipsychotics, such as risperidone and quetiapine, are associated with a lower risk of TD compared to typical antipsychotics. These medications work by balancing dopamine and serotonin levels in the brain, reducing the likelihood of involuntary movements. They are often prescribed as first-line treatments to minimize TD risk. Regular monitoring and tailored dosing further enhance their safety profile, making them a preferred choice for long-term management of conditions requiring antipsychotic therapy.

Management and Treatment Options

Management of TD involves non-drug interventions and pharmacological treatments. Non-drug approaches include medication adjustments and lifestyle changes. Pharmacological options aim to reduce symptoms using specific therapies, improving quality of life.

6.1 Non-Drug Interventions

Non-drug interventions are often the first step in managing TD. These include discontinuing or reducing the dose of antipsychotic medications when possible. Lifestyle modifications, such as stress reduction and regular physical activity, can also help alleviate symptoms. Supportive therapies, including counseling and patient education, play a crucial role in improving quality of life. Early intervention and monitoring are key to minimizing the impact of TD on daily functioning and overall well-being.

6.2 Pharmacological Treatments

Pharmacological treatments remain the primary approach for managing TD. Medications like AUSTEDO® (deutetrabenazine) and other VMAT2 inhibitors are FDA-approved to reduce involuntary movements. These drugs work by regulating dopamine levels in the brain. Additionally, switching to second-generation antipsychotics, which have a lower risk of causing TD, may help alleviate symptoms. Regular monitoring and adjusting dosages are crucial to optimize effectiveness and minimize side effects. These treatments aim to improve symptom control and patient quality of life.

Current Research and Emerging Therapies

Current research focuses on developing innovative treatments for TD, including targeted therapies and ongoing clinical trials, aiming to improve symptom management and patient outcomes effectively.

7.1 Ongoing Studies and Clinical Trials

Ongoing studies and clinical trials are exploring novel therapies for TD, focusing on reducing involuntary movements and improving quality of life. Researchers are investigating new pharmacological agents targeting dopamine pathways and evaluating non-invasive interventions. These studies aim to address the complex mechanisms behind TD, offering hope for more effective and sustainable treatments in the future. Participation in clinical trials provides patients with access to cutting-edge therapies while advancing medical understanding of this condition.

7.2 Emerging Therapies for TD

Emerging therapies for TD include second-generation antipsychotics like clozapine, which may reduce symptoms. VMAT2 inhibitors, such as deutetrabenazine and AUSTEDO XR, are FDA-approved treatments. Botulinum toxin injections are being explored for localized symptoms. Deep brain stimulation (DBS) is also being investigated for severe, treatment-resistant cases. These therapies aim to target the underlying dopamine imbalances and provide relief from involuntary movements, offering new hope for managing TD effectively.

Quality of Life and Patient Support

Support for TD patients includes downloadable resources, helpful videos, and interactive tools. These materials guide caregivers and patients through treatment, improving daily life and overall well-being effectively.

8.1 Impact of TD on Daily Life

Tardive dyskinesia significantly impacts daily life, affecting patients’ ability to perform routine tasks and maintain social interactions. The involuntary movements can lead to emotional distress, stigma, and reduced self-esteem. Quality of life is further compromised by challenges in communication and physical discomfort. Understanding the burden of TD helps tailor supportive care to address these challenges effectively.

8.2 Resources for Patients and Caregivers

Various resources are available to support patients and caregivers, including downloadable fact sheets and educational materials. Helpful videos about TD and AUSTEDO XR provide insights into management and treatment. A six-step interactive journey guides caregivers on screening, diagnosis, and follow-up care. These tools aim to enhance understanding and improve quality of life for those affected by TD, offering practical advice and emotional support.

Public Health Perspective

Public health perspective on TD focuses on its prevalence across populations, economic burden, and strategies to reduce incidence through second-generation antipsychotics, minimizing long-term health impacts.

9.1 Prevalence of TD in Different Populations

Tardive dyskinesia prevalence varies across populations, ranging from 5% to 50%, depending on factors like medication type and duration of use. Studies show higher rates in older adults, females, and those with chronic mental health conditions. Second-generation antipsychotics have reduced TD incidence compared to typical antipsychotics. Ethnic and metabolic factors also influence prevalence, with certain groups more susceptible. Understanding these patterns aids in early detection and tailored interventions for at-risk populations.

9.2 Economic Burden of TD

Tardive dyskinesia imposes significant economic burden on patients and healthcare systems. Direct costs include medications, hospitalizations, and rehabilitation, while indirect costs involve lost wages and caregiver expenses. Studies estimate annual costs per patient exceed $10,000, with prolonged cases increasing financial strain. Early diagnosis and effective management are crucial to reducing long-term economic impact. Awareness of these costs highlights the need for preventive strategies and cost-effective treatment approaches to alleviate the burden on individuals and society.

Interactive Tools and Educational Materials

Access interactive tools and educational materials, such as the six-step TD care journey, helpful videos, and fact sheets, to guide patients and caregivers through diagnosis, treatment, and support.

  • Explore the six-step interactive journey for TD care.
  • Watch educational videos on TD management.
  • Download fact sheets for comprehensive understanding.

10.1 Six-Step Interactive Journey for TD Care

The six-step interactive journey for TD care is a comprehensive guide designed to help patients and caregivers navigate diagnosis, treatment, and ongoing management. Step 1 focuses on identifying symptoms and screening for TD. Step 2 involves a detailed diagnosis using tools like the AIMS scale. Step 3 explores treatment options, including non-drug interventions and pharmacological therapies. Step 4 emphasizes regular monitoring of symptoms and treatment adjustments. Step 5 highlights lifestyle changes to improve quality of life. Step 6 provides resources for long-term support and education. This journey ensures personalized care and empowerment for those affected by TD.

  • Downloadable fact sheets and videos are available for each step;

10.2 Helpful Videos and Fact Sheets

Helpful videos and fact sheets on tardive dyskinesia provide comprehensive insights into understanding and managing the condition. These resources, including AUSTEDO XR materials, offer detailed information on symptoms, diagnosis, and treatment options. Videos and guides are designed to educate patients and caregivers, emphasizing the importance of early detection and proper care. They serve as practical tools for navigating the complexities of TD and improving quality of life for those affected.

Recent Updates and Advancements

11.1 Latest Findings on TD

Recent advancements in TD research highlight updated treatment guidelines and emerging therapies. Ongoing studies focus on improving outcomes, offering hope for better management and symptom reduction.

Recent advancements in TD research reveal promising developments in understanding and managing the condition. Updated guidelines emphasize early detection and personalized treatment approaches. Studies highlight the role of dopamine activity in TD development, while new therapies aim to reduce symptom severity. The emergence of interactive tools, such as the six-step TD care journey, enhances patient and caregiver education. Additionally, fact sheets and updated AIMS assessments provide clearer frameworks for evaluating and addressing TD effectively.

11.2 Updates in Treatment Guidelines

Recent updates in treatment guidelines emphasize a personalized approach to managing TD, focusing on early detection and minimizing medication risks. Second-generation antipsychotics are now prioritized due to their lower risk of causing TD. Non-drug interventions, such as therapy, are also recommended. Additionally, new FDA-approved medications like deutetrabenazine and valbenazine offer hope for symptom reduction. Guidelines stress regular monitoring and tailored treatment plans to improve patient outcomes and quality of life.

Tardive dyskinesia significantly impacts patients’ quality of life, emphasizing the need for awareness and effective management strategies to improve outcomes and support affected individuals.

12.1 Summary of Key Points

Tardive dyskinesia (TD) is an incurable movement disorder often caused by long-term antipsychotic use. It involves involuntary, repetitive movements, typically affecting the face and limbs. Tardive dyskinesia fact sheet pdf highlights its symptoms, risk factors, and diagnostic tools like AIMS. Management focuses on minimizing medication use and exploring alternative treatments. Early detection and prevention strategies, such as using second-generation antipsychotics, are crucial; Recent advancements in therapies and patient support resources aim to improve quality of life for those affected.

12.2 Future Directions in Managing TD

Future management of TD focuses on advancing research into underlying mechanisms and developing targeted therapies. Clinical trials explore new drugs to reduce symptoms without worsening mental health conditions. Personalized treatment approaches, tailored to individual risk factors, are being prioritized. Additionally, enhancing patient education and support systems remains a key priority. Ongoing studies aim to improve early detection and prevention strategies, while emerging technologies may offer innovative solutions for managing TD effectively.

References and Further Reading

Access tardive dyskinesia fact sheet pdf for comprehensive resources. Explore helpful videos, interactive tools, and detailed guides to support understanding and managing TD effectively.

13.1 Key Studies and Publications

Notable studies, such as Carbon et al.’s meta-analysis, highlight the prevalence of TD during second-generation antipsychotic use. The Mental Health Assessment Review Group provides detailed insights. Tardive dyskinesia fact sheet pdf references these studies, offering evidence-based guidance. Publications emphasize the importance of early detection and management. Research from the National Institute of Mental Health and clinical trials further explore treatment options and prevention strategies, ensuring a comprehensive understanding of TD.

13.2 Recommended Resources for Patients

Downloadable resources, such as the tardive dyskinesia fact sheet pdf, provide comprehensive guides for patients. Videos on TD and AUSTEDO XR offer visual insights. The six-step interactive journey aids in understanding screening and follow-up. Fact sheets and publications from the National Institute of Mental Health are invaluable. These tools help patients and caregivers navigate TD management, ensuring informed decisions and improved care.

Byjacquelyn

cars autism pdf

The Childhood Autism Rating Scale (CARS) is a widely used diagnostic tool for assessing autism severity in children. It evaluates behavioral patterns and emotional responses to identify autism symptoms, aiding in early detection and treatment planning. The scale is simple, effective, and relies on clinical observations, making it a valuable resource for professionals.

What is CARS?

The Childhood Autism Rating Scale (CARS) is a 15-item behavioral rating scale used to assess autism symptoms in children. It evaluates various behavioral domains, such as emotional responses and social interactions, to identify autism spectrum disorder (ASD). Designed for children aged 2-4, CARS is a clinical tool that requires minimal training to administer. It is widely used by professionals to monitor developmental progress and plan interventions. While it does not provide a formal diagnosis, it serves as a valuable component of comprehensive autism assessments, offering insights into symptom severity and treatment needs.

Purpose of CARS

The primary purpose of the Childhood Autism Rating Scale (CARS) is to assess the severity of autism spectrum disorder (ASD) in children. It helps clinicians identify and evaluate behavioral symptoms, such as social interactions, emotional responses, and communication patterns. CARS is used to guide diagnosis, monitor developmental progress, and inform treatment planning. While it is not a standalone diagnostic tool, it provides valuable insights into symptom severity, enabling professionals to develop tailored interventions and track the effectiveness of therapies over time.

Relevance of CARS in Autism Assessment

The Childhood Autism Rating Scale (CARS) holds significant relevance in autism assessment due to its ability to provide a comprehensive evaluation of behavioral symptoms. It is widely recognized for its simplicity and effectiveness, requiring minimal training to administer. CARS is particularly useful for distinguishing children with autism from those with other developmental disorders. Additionally, it serves as a valuable tool for monitoring progress and intervention outcomes, making it a cornerstone in both clinical practice and research settings. Its broad applicability across ages and functional levels further enhances its utility in understanding autism spectrum disorder.

History and Development of CARS

CARS was developed in 1988 by Eric Schopler and colleagues to assess autism symptoms in children, based on clinical observations and behavioral evaluations. It has since evolved into CARS2.

Creators of CARS

The Childhood Autism Rating Scale (CARS) was developed by Eric Schopler, Robert J. Reichler, and Barbara Rochen Renner in 1979. These researchers aimed to create a tool that could identify autism symptoms and differentiate them from other developmental disorders. Their work laid the foundation for standardized autism assessment, making CARS a cornerstone in diagnostic practices. The creators’ expertise in child psychology and autism research ensured the scale’s reliability and applicability across diverse clinical settings.

Evolution of CARS Over Time

The Childhood Autism Rating Scale (CARS) has undergone significant updates since its introduction in 1979. The original version was refined to address emerging research and clinical needs, leading to the development of CARS2 in 2010. This revised edition aligns with the DSM-5 criteria for Autism Spectrum Disorder (ASD), improving its diagnostic accuracy. CARS2 expanded its applicability to a broader age range and functional levels, ensuring it remains a relevant and effective tool for assessing autism severity in diverse populations. These updates reflect ongoing efforts to enhance its utility in clinical and research settings.

Current Version: CARS2

CARS2, the updated version of the Childhood Autism Rating Scale, is a refined diagnostic tool designed to assess autism spectrum disorder (ASD) across all ages and functional levels. It incorporates decades of research and clinical use, providing a comprehensive evaluation of behavioral indicators. The scale includes updated criteria aligned with current diagnostic standards, ensuring accurate and reliable assessment. CARS2 is widely used by professionals to identify symptom severity, aiding in diagnosis and treatment planning. Its adaptability makes it a valuable resource for both clinical and research settings, supporting improved outcomes for individuals with ASD.

Structure and Components of CARS

CARS is a 15-item behavioral rating scale assessing social interactions, communication, and repetitive behaviors. It provides a comprehensive evaluation of autism symptoms, aiding in accurate diagnosis and intervention planning.

Behavioral Domains Assessed by CARS

CARS evaluates key behavioral domains, including social interactions, verbal and non-verbal communication, and repetitive behaviors. It assesses emotional responses, play skills, and sensory sensitivities. Each domain is rated on a severity scale, providing a comprehensive profile of autism symptoms. This structured approach helps clinicians identify specific challenges and strengths, guiding targeted interventions. By focusing on these core areas, CARS offers a detailed understanding of a child’s behavior, aiding in accurate diagnosis and personalized support strategies.

Scoring System and Interpretation

CARS uses a 15-item scoring system, with each item rated on a 4-point scale (1-4). Total scores range from 15 to 60, where higher scores indicate greater severity. Interpretation categories include: 30 or below (minimal symptoms), 30-36.5 (mild-to-moderate symptoms), and 37 or higher (severe symptoms); These scores help differentiate autism from other developmental disorders and guide treatment planning. The scoring system provides a clear framework for understanding symptom severity and tracking progress over time, ensuring accurate and reliable assessments for clinicians and researchers.

Age and Functional Level Appropriateness

The original CARS was designed for children aged 2-4, but the updated CARS2 is suitable for all ages and functional levels. It assesses individuals with varying abilities, from those with severe intellectual disabilities to high-functioning autism. This versatility makes CARS2 a comprehensive tool for evaluating autism severity across diverse populations, ensuring accurate and reliable assessments regardless of age or cognitive level. Its broad applicability supports consistent evaluation and treatment planning for individuals with autism spectrum disorder.

Administration and Use of CARS

CARS is administered by trained clinicians through direct observation of the child, assessing behavioral indicators of autism to determine severity and inform diagnosis and treatment strategies.

Who Can Administer CARS?

CARS is designed for trained clinicians, including psychologists, psychiatrists, and specialists in autism spectrum disorder (ASD). Administration requires expertise in behavioral assessment and diagnostic criteria. Clinicians must undergo specific training to ensure accurate and reliable ratings. While primarily used by professionals, educators and therapists with appropriate training may also administer the scale under supervision. Proper training ensures consistency and validity in evaluating autism severity, making it a reliable tool for diagnosis and treatment planning.

Process of Administering CARS

Administering CARS involves observing a child’s behavior across 15 key areas, rating each item on a scale from 1 to 4. The process requires the administrator to assess responses, emotional reactions, and social interactions. Observations are typically conducted in a clinical or natural setting, ensuring the child’s behavior is representative. The evaluation is straightforward, with clear scoring guidelines to determine autism severity. Training is essential for accurate administration, as it involves interpreting subtle behavioral cues. The process is designed to be efficient, providing valuable insights for diagnosis and intervention planning.

Clinical Observations and Ratings

Clinical observations for CARS focus on assessing a child’s behavior across 15 key areas, including emotional responses, social interactions, and communication. Each item is rated on a 4-point scale, with higher scores indicating greater severity. Trained professionals observe and rate behaviors, ensuring accurate and reliable results. These ratings help identify autism symptoms and determine their impact on daily functioning. The process emphasizes objective evaluation, providing a clear framework for understanding autism severity and guiding diagnostic decisions. Observations are typically conducted in natural or clinical settings to capture authentic behavior patterns.

Interpretation of CARS Results

CARS scores categorize autism severity, with higher ratings indicating greater impairment. Scores help diagnose ASD, guide treatment, and monitor progress over time for children;

Severity Levels of Autism Spectrum Disorder

CARS categorizes autism severity into distinct levels based on scores. Mild symptoms (30-36.5) indicate less severe impairment, while moderate (28-34.5) and severe (37+) reflect greater challenges. These levels help clinicians diagnose ASD accurately and guide personalized treatment plans, ensuring appropriate support for children with varying needs. The scale’s clear categorization aids in monitoring progress and adjusting interventions effectively.

Diagnostic Thresholds and Categories

The Childhood Autism Rating Scale (CARS) establishes diagnostic thresholds to identify autism spectrum disorder (ASD). A score of 30 or higher indicates autism, with higher scores reflecting greater severity. The scale categorizes results into three levels: no autism (below 30), mild-to-moderate symptoms (30-36.5), and severe symptoms (37 and above). These thresholds help clinicians diagnose ASD accurately and differentiate it from other developmental disorders, ensuring appropriate interventions are implemented based on the child’s specific needs.

Using CARS for Treatment Planning

The Childhood Autism Rating Scale (CARS) is instrumental in treatment planning by identifying specific behavioral and emotional needs. Clinicians use CARS scores to tailor interventions, addressing areas such as social interaction, communication, and emotional regulation. The scale’s insights help develop individualized strategies, ensuring therapies align with the child’s unique requirements. Regular reassessment with CARS allows professionals to monitor progress and adjust treatment plans, fostering a personalized and adaptive approach to supporting children with autism spectrum disorder.

Applications of CARS Beyond Diagnosis

CARS extends beyond diagnosis, aiding in monitoring progress, intervention outcomes, and research. It supports cultural adaptations, ensuring comprehensive and inclusive autism assessment across diverse populations and settings globally.

Monitoring Progress and Intervention Outcomes

CARS is instrumental in tracking developmental changes and assessing the effectiveness of interventions. By regularly administering the scale, clinicians can monitor a child’s progress over time, identifying areas of improvement or regression. This data helps refine treatment plans, ensuring targeted support. CARS also provides insights into how a child responds to specific therapies, enabling informed decision-making. Its ability to document incremental changes makes it a valuable tool for ongoing assessment and adjustment of intervention strategies, ultimately supporting better outcomes for individuals with autism.

Research Applications of CARS

CARS is widely utilized in research to study autism spectrum disorder (ASD) severity and co-morbidities. It helps identify symptom patterns and developmental trajectories, enabling researchers to explore interventions and outcomes. The scale’s standardized format ensures consistency across studies, making it a reliable tool for investigating ASD. Researchers use CARS to assess behavioral changes, emotional responses, and social interactions, contributing to a deeper understanding of autism’s complexities. Its application in longitudinal studies aids in tracking developmental progress and evaluating treatment efficacy, making it invaluable for advancing autism research and improving clinical practices.

Cultural and Language Adaptations

CARS has been adapted for use across diverse cultures and languages, ensuring its applicability worldwide. Translations into languages like Spanish and French enable researchers and clinicians to assess autism symptoms in multicultural settings. Cultural adaptations focus on maintaining the scale’s validity while respecting regional differences in behavior and communication. This ensures that CARS remains effective in identifying autism traits across varied populations. Ongoing efforts continue to refine the scale for global use, addressing potential cultural biases and improving its accessibility for non-English speaking communities.

Strengths and Limitations of CARS

CARS is a widely used, simple, and effective tool for assessing autism, suitable for various ages. However, it requires trained clinicians and isn’t a standalone diagnostic tool.

Advantages of Using CARS

The Childhood Autism Rating Scale (CARS) is a widely used and effective tool for assessing autism symptoms. It is simple to administer, requires minimal training, and provides clear, observable ratings. CARS is suitable for children of various ages and functional levels, making it versatile for clinical and educational settings. Its reliance on clinical observations ensures consistency, and it serves as a valuable aid for treatment planning. Additionally, CARS is useful for monitoring progress over time, offering insights into the effectiveness of interventions. Its widespread use has established it as a reliable resource for professionals.

Limitations and Potential Biases

While CARS is a valuable tool, it has limitations. It relies on clinical judgment, which may introduce subjectivity. The scale does not provide a diagnosis on its own and requires additional assessments. Cultural and language biases can affect ratings, as it may not account for diverse communication styles. Additionally, CARS focuses on observed behaviors, potentially overlooking internal experiences. It is not suitable for children under 2 years old and may not capture the full spectrum of autism traits. These limitations highlight the need for comprehensive assessments and cultural sensitivity when using CARS.

Comparison with Other Autism Assessment Tools

CARS differs from tools like the Autism Diagnostic Observation Schedule (ADOS-G) and the Modified Checklist for Autism in Toddlers (M-CHAT). While ADOS-G focuses on interactive behaviors, CARS assesses a broader range of symptoms. M-CHAT is a parent-reported screener, whereas CARS relies on clinical observations. CARS is praised for its simplicity and observational nature but may lack the depth of other tools. It is often used alongside other assessments for a comprehensive evaluation, as no single tool captures all aspects of autism spectrum disorder. Each tool has unique strengths, and CARS remains a valuable component in diagnostic processes.

Obtaining and Using the CARS PDF

The CARS PDF can be downloaded from official sources or purchased through authorized distributors. It is essential to use the scale ethically and only for professional assessments.

Where to Find the CARS PDF Online

The CARS PDF can be found on official psychological assessment websites or through authorized distributors. Some versions are available for free download, while others require purchase. Ensure you access it from reputable sources to guarantee authenticity and compliance with ethical standards. Additionally, check for translations or adaptations in multiple languages to accommodate diverse needs. Always verify the version, as outdated editions may not align with current diagnostic criteria. For professional use, institutional access or direct purchase from the publisher is often recommended.

How to Use the CARS PDF Effectively

Using the CARS PDF effectively requires proper training and understanding of its structure. Begin by reviewing the 15 behavioral items and scoring guidelines. Conduct thorough clinical observations of the child’s behavior, focusing on emotional responses, social interactions, and communication patterns. Score each item based on severity, ensuring consistency and accuracy. Compare the total score to diagnostic thresholds to assess autism severity. Use the results alongside other assessments for comprehensive evaluation. Ensure the administrator is trained to interpret scores correctly, as the tool is designed for professional use in clinical or educational settings to support accurate diagnosis and treatment planning.

Legal and Ethical Considerations

Using the CARS PDF requires adherence to legal and ethical standards. Ensure the document is obtained from authorized sources to respect copyright laws. Only trained professionals should administer and interpret the scale to maintain ethical practice. Confidentiality must be upheld when handling personal data and assessment results. Informed consent is essential when evaluating children. Misuse or unauthorized distribution of the CARS PDF may lead to legal consequences. Always follow professional guidelines to ensure responsible and ethical use of this diagnostic tool in clinical and educational settings.

Community Engagement and Autism Awareness

Community events like “Autos for Autism” raise awareness and funds, fostering inclusion and acceptance. These initiatives educate the public and support families, promoting autism understanding and advocacy.

Events Like “Autos for Autism”

Events like “Autos for Autism” bring together car enthusiasts and families to raise awareness and funds for autism support. These gatherings showcase classic cars, host interactive activities, and provide educational resources. They foster community engagement, promote inclusivity, and celebrate neurodiversity. By involving local businesses and organizations, such events inspire collective action and empathy. Collaborations with advocacy groups, like the Autistic Self Advocacy Network, enhance their impact. These events not only fundraise but also educate attendees about autism, encouraging acceptance and support for individuals and families affected by autism spectrum disorder.

Role of CARS in Raising Awareness

The Childhood Autism Rating Scale (CARS) plays a significant role in raising awareness about autism by providing a standardized tool for understanding autism symptoms. It helps professionals and caregivers identify signs early, fostering education and discussion. By simplifying complex behavioral assessments, CARS makes autism evaluation accessible, promoting broader understanding. Its widespread use ensures consistent communication about autism, reducing misconceptions and encouraging empathy. CARS also aids in training programs, equipping educators and healthcare providers with vital knowledge, thus contributing to a more informed and supportive community for individuals with autism.

Supporting Families and Individuals with Autism

The Childhood Autism Rating Scale (CARS) supports families and individuals with autism by providing clear insights into behavioral needs and challenges. It empowers caregivers and professionals to develop tailored interventions, fostering a supportive environment for growth. By identifying specific areas of difficulty, CARS enables targeted strategies to enhance communication, social interaction, and emotional well-being. Additionally, community resources and events, such as “Autos for Autism,” complement CARS by offering practical assistance and raising awareness, ensuring individuals with autism receive the understanding and support they deserve to thrive.

Future Directions for CARS and Autism Research

Future advancements in CARS include integration with technology for enhanced accuracy and global collaboration to improve autism assessment tools, ensuring better support and understanding for individuals with autism.

Advancements in Assessment Tools

Advancements in CARS include updated criteria to reflect current autism understanding and improved digital integration for easier administration. AI-driven analytics now enhance scoring accuracy and provide real-time insights. The tool’s adaptability ensures it remains relevant across diverse cultural contexts. Ongoing research focuses on expanding age ranges and functional levels, making it accessible for long-term monitoring. Telehealth platforms are also being explored to broaden accessibility. These innovations aim to refine diagnosis and support, ensuring CARS remains a cornerstone in autism assessment and research globally.

Integration with Technology

CARS is now integrated with digital platforms, enabling clinicians to administer assessments via tablets or computers. AI-driven analytics improve scoring accuracy and provide real-time insights. Telehealth platforms are being explored to expand accessibility. Digital tools enhance data tracking, allowing for consistent monitoring of progress. This integration streamlines the assessment process, making it more efficient for professionals. Technology also supports remote evaluations, breaking down geographical barriers. These advancements ensure CARS remains a cutting-edge tool in autism assessment, adapting to modern clinical needs while maintaining its reliability and effectiveness.

Global Collaboration in Autism Research

Global collaboration in autism research has enhanced the understanding and application of CARS worldwide. International partnerships among researchers and clinicians facilitate the sharing of data and best practices, ensuring consistent diagnostic criteria. Cultural adaptations of CARS enable its use across diverse populations, fostering a unified approach to autism assessment. This global effort promotes standardized research methodologies and improves early intervention strategies. Collaborative initiatives also address regional disparities in autism care, ensuring equitable access to diagnostic tools and support. Such teamwork is vital for advancing autism research and improving outcomes for individuals worldwide.

The Childhood Autism Rating Scale (CARS) is a vital tool for assessing autism, emphasizing observation and simplicity. Its widespread use has significantly contributed to understanding and supporting autism globally.

The Childhood Autism Rating Scale (CARS) is a 15-item behavioral assessment tool used to identify and evaluate autism symptoms in children; It focuses on domains like social interactions, communication, and emotional responses. CARS is widely recognized for its simplicity and effectiveness in distinguishing autism from other developmental disorders. Its clinical observations provide valuable insights for diagnosis, treatment planning, and monitoring progress. As a reliable and accessible tool, CARS plays a crucial role in supporting early intervention and improving outcomes for individuals with autism spectrum disorder.

Final Thoughts on Autism Assessment and Support

The Childhood Autism Rating Scale (CARS) remains a cornerstone in autism assessment, offering insights into symptom severity and guiding personalized interventions. Early detection through tools like CARS is critical for improving outcomes, enabling timely support and therapy. Beyond assessment, fostering inclusive environments and promoting awareness are essential for empowering individuals with autism. Community initiatives, such as “Autos for Autism” events, highlight the importance of collective effort in raising awareness and providing resources. Continued research and collaboration are vital to advancing autism care and ensuring compassionate support for all affected individuals and their families.

Byjacquelyn

the peace of wild things pdf

This contemplative poem by Wendell Berry invites readers to find solace in nature. Set in a rural landscape‚ it reflects themes of peace‚ simplicity‚ and the natural world‚ offering refuge from modern life’s complexities.

Overview of the Poem

“The Peace of Wild Things” is a profound meditation on finding solace in nature. Written by Wendell Berry‚ the poem explores themes of peace‚ simplicity‚ and the human connection to the natural world. Set in a rural landscape‚ it invites readers to escape the burdens of modern life and find refuge in the simplicity of the wild. The speaker reflects on the freedom of creatures untroubled by human anxieties‚ emphasizing the healing power of nature. Through vivid imagery and a calm tone‚ Berry contrasts the chaos of human existence with the serene order of the natural world. This poem‚ often described as a mantra for peace‚ encourages mindfulness and a return to the essential beauty of the earth. Its timeless message resonates deeply‚ offering readers a path to inner calm and redemption through the grace of the wild.

Author Background: Wendell Berry

Wendell Berry is a distinguished American novelist‚ poet‚ essayist‚ and environmental activist‚ born in 1934 in Henry County‚ Kentucky. His literary career spans over six decades‚ with notable works such as “The Unsettling of America” and “The Mad Farmer Poems.” Berry’s writing often emphasizes rural life‚ sustainable agriculture‚ and the interconnectedness of humanity and nature. A vocal advocate against industrial agriculture‚ he promotes local economies and environmental stewardship. His poetry‚ including “The Peace of Wild Things‚” reflects his deep connection to the land and his belief in the healing power of nature. Berry’s work continues to resonate with readers seeking solace and wisdom in an increasingly industrialized world.

Significance of the Poem in Modern Literature

“The Peace of Wild Things” holds profound significance in modern literature as a timeless meditation on humanity’s relationship with nature. It resonates deeply in an era marked by environmental crises and urbanization‚ offering a poignant reminder of nature’s healing power. Berry’s work bridges the gap between poetry and environmental advocacy‚ making it a cornerstone of eco-literature. Its universal themes of peace‚ simplicity‚ and redemption transcend time‚ appealing to readers seeking solace in a chaotic world. The poem’s influence is evident in contemporary poetry‚ inspiring writers to explore nature’s role in human life. Its simplicity and depth ensure its relevance‚ making it a cherished piece in both academic and personal reading. Berry’s voice remains a vital call for mindfulness and harmony with the natural world.

Themes in “The Peace of Wild Things”

The poem explores themes of nature as a refuge‚ simplicity‚ and inner peace‚ offering solace from life’s complexities through its meditative and reflective tone.

Nature as a Source of Solace

Nature in the poem serves as a refuge from emotional turmoil. Berry portrays wild things—like still water and day-blind stars—as embodiments of peace‚ untouched by human anxieties. By immersing in these elements‚ the speaker finds comfort‚ suggesting nature’s ability to heal and offer solace. The natural world is depicted as a sanctuary where one can escape the burdens of forethought and grief‚ emphasizing its restorative power. This theme resonates deeply in modern times‚ where individuals often seek escape from the stresses of urban life‚ highlighting nature’s enduring role as a source of tranquility and renewal.

The Concept of Simplicity and Rural Life

The poem celebrates the simplicity of rural life‚ offering a stark contrast to the complexities of modern existence. Berry’s depiction of the natural world emphasizes the beauty of an uncluttered life‚ where the rhythms of nature provide a sense of balance and harmony. The rural setting‚ with its still water and day-blind stars‚ invites the reader to step away from the chaos of urban life and reconnect with the earth. This simplicity is not just physical but also spiritual‚ suggesting that a life closer to nature fosters clarity and inner peace. Berry’s work often highlights the moral and spiritual renewal found in rural landscapes‚ making “The Peace of Wild Things” a powerful ode to the transformative power of simplicity and the natural world.

Inner Peace and Redemption

Berry’s poem presents nature as a sanctuary for inner peace and redemption. The speaker finds solace in the stillness of the natural world‚ escaping the burdens of human anxiety and foresight. The phrase “I rest in the grace of the world” captures the essence of this redemption‚ suggesting a return to harmony with creation. Berry’s work often explores the idea that personal and spiritual renewal can emerge from immersion in the natural world‚ offering readers a way to transcend existential worries. This theme resonates deeply in a modern context‚ where individuals often seek refuge from the pressures of life. Through its gentle imagery‚ the poem offers a timeless reminder of nature’s healing power and the possibility of finding peace amidst life’s challenges.

The Role of Forethought and Grief

Berry’s poem subtly explores the burden of forethought and grief‚ contrasting it with the untroubled existence of wild things. The line‚ “who do not tax their lives with forethought of grief‚” highlights the freedom of nature from human anxieties. The speaker seems to escape the weight of such burdens by immersing himself in the natural world. This theme reflects Berry’s broader emphasis on the human condition’s struggles with worry and despair. By juxtaposing human foresight with the present-focused simplicity of wild things‚ the poem invites readers to reconsider their relationship with anxiety and loss. This introspective element adds depth to the poem’s meditative tone‚ offering a profound reflection on the human experience and the potential for release from emotional turmoil through connection with nature. Berry’s words gently encourage letting go of burdens‚ seeking solace in the here and now.

Structure and Style of the Poem

The poem’s simple‚ direct structure creates a meditative atmosphere. Short‚ concise lines and vivid imagery reflect Berry’s rural roots‚ emphasizing a connection to nature and inner calm.

Use of Imagery and Symbolism

Berry masterfully employs imagery and symbolism to evoke a sense of tranquility and connection to nature. The “still water” and “day-blind stars” create vivid‚ serene visuals‚ symbolizing peace and the sublime. These elements represent the untouched beauty of the natural world‚ contrasting with human anxiety. Berry’s imagery invites readers to immerse themselves in the simplicity of rural life‚ where nature’s grace offers solace. The poem’s symbols‚ such as water and stars‚ are not mere decorations but tools to guide the reader toward introspection and harmony with the environment. Berry’s use of imagery and symbolism reinforces the poem’s central themes of peace‚ redemption‚ and the healing power of nature‚ making it a profound meditation on modern life’s complexities. His language‚ though simple‚ carries deep emotional and philosophical weight.

The Role of Water as a Symbol

Water in “The Peace of Wild Things” serves as a powerful symbol of tranquility‚ grace‚ and the natural world’s timeless essence. Berry’s reference to “still water” evokes imagery of calmness and reflection‚ offering a stark contrast to the turmoil of human existence. The water symbolizes purity and serenity‚ acting as a refuge from the burdens of forethought and grief. It also represents the simplicity and elegance of rural life‚ where nature’s rhythms provide solace. The presence of water creates a sense of continuity and timelessness‚ emphasizing the enduring peace that wild things embody. Berry’s use of water as a symbol invites readers to immerse themselves in the healing power of nature‚ reinforcing the poem’s central message of finding redemption in the natural world. Through this imagery‚ Berry underscores the profound connection humans can have with the earth.

Repetition and Rhythm in the Poem

Repetition and rhythm play a subtle yet significant role in “The Peace of Wild Things‚” enhancing its meditative and reflective tone. Berry’s use of repetitive phrases‚ such as “I come into” and “And I feel‚” creates a sense of ritual and flow‚ mirroring the natural world’s steady rhythms. The poem’s cadence is deliberate and measured‚ evoking the quiet‚ unhurried pace of rural life. This rhythmic structure invites readers to slow down and immerse themselves in the poem’s tranquil atmosphere. The repetition also underscores the speaker’s journey toward inner peace‚ emphasizing the recurring solace found in nature. Berry’s mastery of rhythm complements the poem’s themes‚ offering a harmonious blend of form and meaning that deepens its emotional resonance and spiritual impact. Through these elements‚ Berry crafts a poem that feels both timeless and profoundly personal.

Language and Tone: Creating a Meditative Atmosphere

Wendell Berry’s use of language in “The Peace of Wild Things” is sparse‚ deliberate‚ and evocative‚ crafting a meditative atmosphere that invites introspection. The tone is calm and reflective‚ with a focus on simplicity that mirrors the natural world. Berry employs precise‚ vivid imagery to conjure scenes of stillness and peace‚ such as “still water” and “day-blind stars‚” which evoke a sense of quiet contemplation. The language is accessible yet profound‚ making the poem feel both personal and universal. This tone creates a space for readers to reflect on their own relationship with nature and inner peace. The meditative quality of the poem is further enhanced by its deliberate pacing‚ drawing readers into a world where time slows‚ and the beauty of the present moment is revealed. Berry’s mastery of tone and language transforms the poem into a spiritual refuge‚ offering solace and renewal.

Analysis of Key Lines

Wendell Berry’s poem masterfully explores themes of nature‚ simplicity‚ and inner peace through its lyrical language‚ offering profound insights into the human experience. Each line is carefully crafted to evoke a sense of tranquility‚ inviting readers to reflect on their connection to the natural world.

“I come into the peace of wild things”

This opening line introduces the central theme of finding solace in nature. The speaker seeks refuge from life’s complexities by immersing themselves in the natural world. The phrase “peace of wild things” symbolizes freedom from human anxieties‚ emphasizing the healing power of nature. The imagery evokes a sense of calm and simplicity‚ contrasting with the burdens of modern life. Berry’s use of “wild things” highlights the untamed and pure aspects of the natural world‚ suggesting a return to a more authentic state of being. This line sets the tone for the rest of the poem‚ inviting reflection on the human condition and our relationship with the environment. The simplicity of the language underscores the profound message‚ making it accessible and deeply resonant.

“And I feel above me the day-blind stars”

This line captures the profound connection between the speaker and the natural world. The “day-blind stars” symbolize the unseen yet constant presence of celestial beauty‚ offering comfort. The imagery suggests a deep trust in the universe’s harmony‚ emphasizing the idea of finding peace beyond human struggles. Berry’s use of “day-blind” highlights the stars’ invisibility during daylight‚ yet their existence remains a source of solace. This line reinforces the theme of nature as a sanctuary‚ reminding readers of the timeless and unchanging aspects of the world. The poetic language evokes a sense of awe and tranquility‚ inviting reflection on the human condition and our place within the larger cosmic narrative. The stars serve as a metaphor for hope and guidance‚ even when they are not immediately visible. This line underscores the poem’s meditative and reassuring tone.

“I rest in the grace of the world”

This line embodies the essence of surrender and acceptance‚ reflecting the speaker’s ability to find peace in the natural world. The phrase “grace of the world” suggests an inherent benevolence in existence‚ offering solace and comfort. It captures the idea of letting go of burdens and trusting in the universe’s balance. Berry’s choice of words conveys a deep sense of trust and interconnectedness‚ highlighting the healing power of nature. The line invites readers to embrace a mindset of acceptance and humility‚ finding rest in the world’s inherent grace. This sentiment resonates with Berry’s broader themes of simplicity and the redemptive power of the natural world. The phrase underscores the poem’s message of hope and renewal‚ encouraging readers to seek solace in the timeless beauty of the earth. It is a powerful expression of inner peace and harmony.

The Significance of Wild Things

The wild embodies freedom and innocence‚ contrasting human complexity. Berry’s portrayal highlights nature’s healing power‚ offering solace and encouraging harmony with the natural world.

The Representation of Freedom and Innocence

The wild things in Berry’s poem symbolize freedom and innocence‚ unburdened by human anxieties. They represent a world untainted by complexity‚ where life unfolds naturally and effortlessly. Through imagery‚ Berry contrasts the simplicity of nature with the overcomplicated human existence. The wild creatures‚ untouched by forethought or grief‚ embody a pure form of freedom. Their innocence is a reminder of life’s uncomplicated essence. Berry’s portrayal invites readers to reflect on the beauty of simplicity and the peace that comes from living in harmony with nature. This theme is central to the poem’s message‚ offering a refuge from modern life’s intricacies and burdens.

The Contrast Between Human and Natural Worlds

The poem vividly contrasts the human world‚ marked by anxiety and complexity‚ with the natural world’s serenity. Berry portrays humans as burdened by forethought and grief‚ while wild things embody simplicity. This dichotomy highlights nature’s ability to offer solace‚ untainted by human struggles. The natural world‚ in its stillness and grace‚ stands as a refuge from life’s turmoil. Berry’s depiction underscores the human condition’s intricacies against nature’s uncomplicated essence‚ inviting readers to seek harmony with the earth. This contrast is central to the poem’s message‚ emphasizing the need to reconnect with nature’s peace amidst modern life’s chaos.

The Healing Power of Nature

Nature‚ in Berry’s work‚ serves as a balm for the soul. The poem illustrates how immersing oneself in the natural world can alleviate emotional wounds‚ offering a space for reflection and renewal. The imagery of still water and day-blind stars evokes a sense of calm‚ emphasizing nature’s ability to heal. Berry suggests that by connecting with the earth‚ individuals can transcend their burdens and find inner peace. This theme resonates deeply‚ highlighting nature’s role as a sanctuary from life’s challenges. The poem’s focus on the healing power of nature underscores its relevance in a world increasingly disconnected from the environment‚ inviting readers to seek solace in the wild.

Impact and Reception

“The Peace of Wild Things” has garnered critical acclaim for its profound exploration of nature’s solace. Its influence is evident in contemporary poetry‚ resonating deeply with environmental themes and inspiring reflection on modern life’s disconnection from the natural world.

Critical Acclaim and Popular Response

Wendell Berry’s “The Peace of Wild Things” has received widespread critical acclaim for its profound exploration of nature and human introspection. Readers and scholars alike praise its ability to evoke a sense of calm and connection to the natural world. The poem’s universal themes resonate deeply‚ making it a beloved piece in contemporary literature. Its simplicity and depth have led to its inclusion in various anthologies and educational curricula. Many find solace in its message of finding peace amidst life’s chaos‚ fostering a strong emotional connection. The poem’s popularity endures‚ as it continues to inspire reflection and a renewed appreciation for the beauty of the wild. Its influence is evident in both literary circles and everyday readers seeking solace in its timeless wisdom.

The Poem’s Role in Environmental Literature

“The Peace of Wild Things” holds a significant place in environmental literature‚ emphasizing humanity’s connection to nature. Wendell Berry’s work advocates for a harmonious relationship with the earth‚ encouraging readers to appreciate its beauty and simplicity. The poem’s themes of nature as a source of solace and redemption resonate with environmentalist ideals‚ promoting a deeper understanding of ecological balance. By celebrating the wild‚ Berry underscores the importance of preserving natural spaces and living sustainably. His rural perspective offers a compelling argument against industrialization and the exploitation of the environment. As a result‚ the poem has become a cornerstone in discussions about environmental stewardship and the human responsibility to protect the planet for future generations. Its message remains vital in today’s climate-conscious world‚ inspiring action and reflection.

Its Influence on Contemporary Poetry

Wendell Berry’s “The Peace of Wild Things” has profoundly influenced contemporary poetry by emphasizing simplicity‚ nature‚ and introspection. Its focus on rural life and the human connection to the earth has inspired poets to explore similar themes. Many contemporary poets now embrace Berry’s style‚ blending personal reflection with environmental consciousness. The poem’s meditative tone has encouraged a shift toward more mindful and contemplative writing. Its exploration of solace in nature resonates with modern audiences‚ making it a cornerstone of environmental and rural poetry. Berry’s work continues to inspire a new generation of poets to explore the intersections of humanity‚ nature‚ and inner peace‚ ensuring its enduring legacy in contemporary literature. His influence is evident in the growing emphasis on simplicity and ecological themes in modern poetry. The poem remains a timeless inspiration‚ guiding poets to find meaning in the natural world.

Further Exploration

Delve deeper into Berry’s work by comparing it with other rural poems and exploring its role in educational settings‚ fostering a connection with nature and simplicity.

Comparative Analysis with Other Works by Wendell Berry

Wendell Berry’s The Peace of Wild Things resonates with themes found in his other works‚ such as The Country of Marriage and A Timbered Choir. These poems share a deep connection to nature‚ emphasizing its role as a source of solace and redemption. Berry’s rural roots shine through in his portrayal of simplicity and the cyclical rhythms of life. Similar to his essays‚ the poem critiques modernity’s disconnection from the land‚ advocating for a return to mindfulness and grace. The sparse‚ meditative language mirrors his prose‚ creating a sense of intimacy with the natural world. This consistency in theme and tone underscores Berry’s enduring message of finding peace and meaning in the simplicity of rural life and the timeless wisdom of the earth.

The Poem’s Place in Berry’s Larger Body of Work

The Peace of Wild Things is a quintessential example of Wendell Berry’s poetic and philosophical themes. It sits seamlessly within his broader body of work‚ which often explores the interplay between nature‚ humanity‚ and the search for meaning. Berry’s writings frequently emphasize the importance of rural life‚ simplicity‚ and the interconnectedness of all living things. This poem‚ like much of his work‚ reflects his deep-rooted connection to the land and his critique of modernity’s disconnection from the natural world. Its meditative tone and imagery mirror the reflective style found in his essays and other poems‚ such as those in A Timbered Choir. Together‚ these works create a cohesive vision of life lived in harmony with the earth‚ making The Peace of Wild Things a cornerstone of Berry’s enduring literary legacy.

Teaching the Poem in Educational Settings

Teaching The Peace of Wild Things in classrooms offers a rich opportunity to explore themes of nature‚ simplicity‚ and inner peace. Educators can guide students to analyze Berry’s use of imagery and symbolism‚ fostering deeper connections to the natural world. Interactive discussions can focus on how the poem contrasts rural and urban life‚ encouraging reflection on modern society’s relationship with the environment. Writing exercises‚ such as personal responses to nature‚ can deepen understanding. Additionally‚ the poem’s concise structure makes it an excellent model for teaching poetic devices like repetition and tone. Its universal themes also allow for cross-curricular connections‚ such as integrating it with environmental studies or philosophy. By engaging with Berry’s work‚ students can develop a greater appreciation for literature’s role in exploring humanity’s place in the world.

The Peace of Wild Things offers a timeless message of harmony with nature and inner peace‚ reminding us to seek solace in simplicity amidst modern chaos.

Final Thoughts on the Poem’s Message

Wendell Berry’s The Peace of Wild Things delivers a profound message about finding solace in nature and embracing simplicity. The poem invites readers to step away from the burdens of modern life and reconnect with the natural world. Berry’s words evoke a sense of calm and redemption‚ suggesting that peace is not something distant but inherent in the world around us. By emphasizing the grace of the earth and the stillness of wild things‚ the poem encourages a mindset of mindfulness and gratitude. Its timeless appeal lies in its universal themes of harmony with nature and the human quest for inner peace. Berry’s work continues to resonate‚ offering readers a gentle yet powerful reminder to slow down and appreciate the beauty of the present moment.

Its Timeless Relevance in a Modern World

Wendell Berry’s “The Peace of Wild Things” remains remarkably relevant in today’s fast-paced‚ technology-driven world. The poem’s themes of nature‚ simplicity‚ and inner peace continue to resonate with modern readers seeking solace from the chaos of contemporary life. Berry’s invitation to reconnect with the natural world offers a timeless solution to the stress and anxiety prevalent in modern society. The poem’s emphasis on mindfulness and the beauty of simplicity aligns with current movements toward minimalism and environmental consciousness. Its universal message transcends time‚ appealing to anyone seeking refuge from the complexities of modern existence. Thus‚ “The Peace of Wild Things” not only reflects Berry’s deep connection with the land but also serves as a enduring reminder of nature’s healing power in a rapidly changing world.

Encouraging Readers to Explore More of Berry’s Work

Readers captivated by “The Peace of Wild Things” are encouraged to delve deeper into Wendell Berry’s expansive body of work. Berry’s writings‚ both poetic and prose‚ explore themes of nature‚ community‚ and the human condition‚ offering profound insights into living harmoniously with the world. His essays‚ such as those in The Unsettling of America‚ and novels like Jayber Crow‚ further illuminate his commitment to environmental stewardship and rural life. Berry’s unique voice and timeless wisdom make his work a treasure trove for anyone seeking meaningful reflection. By exploring his broader oeuvre‚ readers can gain a richer understanding of his philosophy and continue to find solace in his words‚ much like the peace offered by wild things.

Byjacquelyn

being a dik swyper guide

Disk sweeping is a process of identifying and removing unnecessary files to free up disk space․ Tools like OmniDiskSweeper help users locate large files and optimize storage efficiently․

1․1 What is Disk Sweeping?

Disk sweeping is the process of systematically identifying and removing unnecessary files, data, and applications to free up disk space․ It helps optimize storage by eliminating redundant or obsolete items that consume valuable space․ Tools like OmniDiskSweeper enable users to scan and analyze disk contents, highlighting large files and folders that can be safely deleted․ This practice prevents data clutter, improves system performance, and ensures efficient use of storage resources․ Regular disk sweeping is essential for maintaining a clean and organized digital environment, especially for users with limited disk capacity․

1․2 Importance of Maintaining Disk Space

Maintaining disk space is crucial for ensuring optimal system performance and efficiency․ Excessive disk usage can lead to slower processing speeds, reduced storage capacity, and increased risk of data loss․ By regularly sweeping disks, users can identify and eliminate unnecessary files, preventing clutter and freeing up space for essential data․ This practice also helps in organizing files more effectively, making it easier to locate and manage important documents․ Furthermore, maintaining disk space can prevent system crashes and improve overall user experience, making it a vital part of digital hygiene and system maintenance routines․

Choosing the Right Disk Sweeper Tool

Selecting the right disk sweeper ensures efficient space management․ Tools like OmniDiskSweeper are ideal for Mac users, offering quick scans and intuitive interfaces to identify large files and optimize storage effectively․

2․1 Overview of Popular Disk Sweeping Tools

Popular disk sweeping tools like OmniDiskSweeper, Wise Disk Cleaner, and BitRecover Disk Cleaner offer efficient solutions for managing disk space․ OmniDiskSweeper is renowned for its speed and ability to scan Mac disks, displaying files by size․ Wise Disk Cleaner is a Windows favorite, providing filters for temporary files and system clutter․ BitRecover Disk Cleaner is a professional tool for thorough forensic cleaning․ These tools vary in features but share the goal of identifying and removing unnecessary files, ensuring optimal disk performance and storage optimization․

2․2 OmniDiskSweeper: A Comprehensive Guide

OmniDiskSweeper is a powerful utility for Mac users, designed to efficiently manage disk space․ It scans your hard drive, displaying files and folders in descending order by size․ This tool is user-friendly, with a clean interface that highlights large files, making it easy to identify and remove unnecessary data․ OmniDiskSweeper also safeguards system files, preventing accidental deletion․ Its advanced features include drilling into directories, sorting, and filtering files, ensuring precise control over your disk space․ This makes it an indispensable tool for optimizing storage and maintaining your Mac’s performance․

Getting Started with OmniDiskSweeper

Download and install OmniDiskSweeper from the official website․ Launch the app, select the disk you want to analyze, and let it scan․ It will display files by size, helping you identify and remove unnecessary data to free up space efficiently․

3․1 Downloading and Installing OmniDiskSweeper

To begin, download OmniDiskSweeper from the official Omni Group website․ Once downloaded, open the DMG file and drag the application to your Applications folder to install․ No additional setup is required․ Launch the app, and it will automatically display a list of connected drives․ Select the disk you wish to analyze, and OmniDiskSweeper will scan it to identify large files and folders․ This straightforward process makes it easy to start managing your disk space effectively․

3․2 Launching the Application and Selecting Disks

After installation, open OmniDiskSweeper from your Applications folder․ The app will display a list of available disks, including your primary drive, typically labeled as Macintosh HD․ Select the disk you wish to analyze․ Once selected, the tool will scan the disk, identifying files and folders by size․ This allows you to easily locate and manage large or unnecessary items․ The interface is user-friendly, ensuring a smooth experience for both novice and advanced users aiming to optimize their disk space efficiently․

Scanning and Analyzing Disk Space

OmniDiskSweeper quickly scans your disk, identifying large files and folders․ Its hierarchical display helps you understand where your disk space is being used efficiently․

4․1 Understanding the Scan Results

Once OmniDiskSweeper completes its scan, it displays files and folders in descending order by size․ This helps users identify the largest items occupying disk space․ The tool highlights system files to prevent accidental deletion․ Users can navigate through directories to locate specific files․ The interface simplifies decision-making for deleting, trashing, or managing files․ This organized approach ensures efficient cleanup without risking essential data loss․ The scan results empower users to reclaim disk space effectively while maintaining system stability and performance․

4․2 Identifying Large Files and Folders

OmniDiskSweeper organizes files by size, making it easy to pinpoint large items consuming disk space․ The tool color-codes system files to avoid accidental deletion․ Users can drill into directories to locate specific files․ This hierarchical view simplifies decision-making for cleanup․ By focusing on oversized media, downloads, or redundant files, users can efficiently reclaim space․ The intuitive interface ensures a systematic approach to managing storage without compromising essential data, helping maintain optimal disk performance and organization․

Managing and Deleting Unnecessary Files

Using OmniDiskSweeper, manage and delete unnecessary files safely․ Highlight large items, avoid system files, and free up disk space effectively with this intuitive tool․

5․1 Safe Deletion Practices

When managing and deleting files, prioritize safety to avoid removing essential system data․ Use OmniDiskSweeper to identify large, unnecessary files while avoiding critical system files․ Always double-check items before deletion to ensure they are non-essential․ Be cautious with system folders, as deleting them can cause operational issues․ Regularly review files in temporary or download folders, as these often contain unnecessary data․ Consider backing up important files before sweeping to prevent accidental loss․ This approach ensures disk space is freed safely and efficiently, maintaining system stability while removing clutter․

5․2 System Files and Folders: What to Avoid

When deleting files, it’s crucial to avoid system-critical folders and files to prevent operational issues․ System files, such as those in the /System, /Library, or /Users directories, are essential for macOS functionality․ Never delete files or folders labeled as system resources, as this can cause instability or require a full system reinstall․ Use OmniDiskSweeper’s built-in warnings to identify and avoid protected files․ Additionally, steer clear of hidden files or folders prefixed with a dot (e․g․, ․Trash), as they often contain essential data․ Always prioritize caution to maintain system integrity while freeing up disk space․

Advanced Features of OmniDiskSweeper

OmniDiskSweeper offers advanced features like directory drilling, file sorting, and filtering by size, enabling users to efficiently manage disk space and locate unnecessary files․

6․1 Drilling Down into Directories

OmniDiskSweeper allows users to drill down into directories, providing a detailed hierarchical view of files and folders․ This feature enables efficient navigation and management of disk space by identifying large or unnecessary files within specific directories․ Users can sort files by size, making it easier to locate and remove unwanted items․ The tool also highlights system files to avoid accidental deletion․ By exploring directories deeply, users can optimize storage effectively while ensuring critical files remain intact․

6․2 Sorting and Filtering Files by Size

OmniDiskSweeper simplifies disk management by allowing users to sort and filter files based on size․ This feature helps identify large, unnecessary files quickly․ By default, files are displayed in descending order of size, making it easy to pinpoint space-hogging items․ Users can also apply filters to focus on specific size ranges, such as files larger than a certain threshold․ This functionality ensures efficient disk cleanup by enabling targeted removal of redundant or oversized files, thereby freeing up significant storage space and improving system performance;

Troubleshooting Common Issues

When encountering issues with OmniDiskSweeper, ensure it’s updated and has proper permissions․ Common problems include slow scans or file deletion errors․
Restarting the app or checking disk permissions often resolves these issues quickly․

7․1 Resolving Disk Space Issues

OmniDiskSweeper excels at resolving disk space issues by identifying and removing unnecessary files․ Its intuitive interface allows users to scan drives, pinpoint large files, and delete them safely․ By highlighting system files to avoid, the tool prevents accidental deletion of critical data․ Regular use of OmniDiskSweeper helps maintain disk health, ensuring optimal performance․ For persistent space problems, combining it with other cleaning tools can maximize efficiency․ Always review files before deletion to ensure data safety and system stability․

7․2 Addressing System File Deletion Warnings

When using tools like OmniDiskSweeper, encountering system file deletion warnings is common․ These warnings protect critical data from accidental removal․ Users should exercise caution and avoid deleting files marked as system-related, as they are essential for OS stability․ If unsure about a file’s purpose, it’s best to leave it untouched․ Regular updates to the sweeping tool ensure accurate file categorization, reducing the risk of erroneous deletions․ Always prioritize system integrity when addressing such warnings to maintain smooth operation and avoid potential crashes or data loss․

Best Practices for Regular Disk Maintenance

Regular disk maintenance involves scheduling sweeps, combining tools, and maintaining organization to prevent clutter and ensure system efficiency without risking essential files․

8․1 Scheduling Regular Sweeps

Regular disk sweeps are essential for maintaining optimal storage and performance․ Schedule sweeps weekly or monthly to prevent clutter buildup․ Use tools like OmniDiskSweeper to automate scans and identify unnecessary files․ Consistency ensures your system remains efficient and free from redundant data․ Set reminders or integrate sweeps into your maintenance routine to keep your disk organized․ This proactive approach helps prevent storage issues and ensures smooth system operation over time․

8․2 Combining with Other Cleaning Tools

For comprehensive disk management, combine OmniDiskSweeper with other cleaning tools to address different types of clutter․ Use system cleaners like AppSweeper to remove leftover application files, while disk sweepers handle large files and folders․ Tools like Wise Disk Cleaner can tackle temporary files and system logs, ensuring a deeper clean․ By integrating multiple tools, you can cover all aspects of disk optimization, ensuring no unnecessary data remains․ This multi-tool approach enhances efficiency and keeps your system running smoothly․ Experiment with combinations to find the best workflow for your needs․

Case Studies and Real-Life Scenarios

Explore real-life examples of disk management, such as recovering space on a Macintosh HD or organizing large media files, to understand practical applications of disk sweeping techniques․

9․1 Recovering Space on a Macintosh HD

Recovering space on a Macintosh HD often involves identifying and removing large, unnecessary files․ Using tools like OmniDiskSweeper, users can scan their disks and locate bulky files or folders․ By drilling down into directories, you can pinpoint items like old backups, unused applications, or cached data that consume valuable space․ Safe deletion practices ensure system stability, as OmniDiskSweeper highlights files used by the system, preventing accidental removal․ This process is particularly useful for users with smaller drives, helping them reclaim space and improve performance without risking data loss or system instability․

9․2 Managing Large Media Files

Large media files, such as videos and high-resolution images, often consume significant disk space․ Tools like OmniDiskSweeper help identify these files, allowing users to decide whether to keep, archive, or delete them․ By organizing media in external drives or cloud storage, users can free up disk space while maintaining access to their files․ This approach is especially useful for creative professionals and hobbyists who work with large media libraries, ensuring their systems remain efficient without sacrificing their digital assets․

Regular disk maintenance is crucial for optimal performance․ Use tools like OmniDiskSweeper to free up space and keep your system efficient․ Explore advanced features for better management․

10․1 Summary of Key Takeaways

Regular disk maintenance is essential for optimizing performance․ OmniDiskSweeper simplifies identifying and removing unnecessary files, freeing up space․ Always prioritize safe deletion practices to avoid system instability․ Combining disk sweeping with other cleaning tools enhances efficiency․ Focus on identifying large files and outdated media while avoiding critical system files․ Scheduling regular sweeps ensures sustained performance․ For advanced users, exploring OmniDiskSweeper’s filtering and directory features offers deeper control․ By integrating these strategies, users can maintain a clutter-free system and improve overall productivity․ Remember, consistent maintenance is key to long-term disk health and efficiency․

10․2 Further Resources for Disk Management

For deeper insights into disk management, explore official guides from The Omni Group for OmniDiskSweeper․ Apple Support offers detailed macOS cleaning tips, while Microsoft provides tools like Disk Cleanup for Windows users․ Additionally, forums like MacRumors and Reddit host user discussions on effective disk maintenance strategies․ YouTube tutorials and blogs often share practical tips for optimizing storage․ These resources complement OmniDiskSweeper, helping you master disk management and keep your system running smoothly․ Explore these to enhance your skills and tackle disk-related challenges confidently․

Byjacquelyn

timex clock radio instructions

Timex clock radios are renowned for their reliability and user-friendly interfaces. These devices combine traditional timekeeping with modern radio features, offering a blend of functionality and convenience. Each model, such as the T231 or T2312, boasts unique features tailored to enhance your daily routine. Understanding your specific Timex clock radio model is essential for optimal use, ensuring you unlock all its capabilities. This guide provides a comprehensive overview to help you navigate and customize your Timex clock radio experience effectively.

1.1 Popular Timex Clock Radio Models (T231, T2312, TW500, T715)

The Timex T231 and T2312 are highly sought-after models, known for their simplicity and essential features. The TW500 offers enhanced radio reception, while the T715 stands out for its user-friendly interface. These models are widely documented, with manuals readily available online, ensuring easy setup and troubleshooting. Their popularity stems from a perfect balance of functionality and affordability, making them ideal for everyday use.

1.2 Importance of Identifying Your Specific Model

Identifying your Timex clock radio model is crucial for proper setup and troubleshooting. Each model, such as the T231 or T715, has unique features and instructions. Manuals are tailored to specific models, ensuring accurate guidance for functions like setting alarms or tuning the radio. Without the correct model information, users may struggle with configuration or resolving common issues, making identification the first step in mastering your Timex clock radio.

Understanding Your Timex Clock Radio

Understanding your Timex clock radio involves familiarizing yourself with its display, buttons, and functionalities. The device combines timekeeping with radio features, offering a user-friendly interface for daily use.

2.1 Key Features and Functionalities

Your Timex clock radio offers a range of features, including AM/FM radio bands, digital tuning, and preset station options. It also includes alarm functions with options for radio or buzzer modes, snooze capabilities, and a sleep timer for listening to the radio. The display provides clear time and date visuals, with adjustable brightness for comfort. Additional features like backup battery support and an extendable antenna ensure reliable performance and better reception, making it a versatile and practical addition to your daily routine.

2.2 Display and Button Layout

The Timex clock radio features a clear digital display showing time, date, and radio frequency. Buttons are intuitively arranged for easy navigation, with labels indicating functions like Mode, Tune, Volume, and Snooze. The layout is designed to minimize clutter, ensuring quick access to essential controls. This user-friendly design allows you to efficiently manage settings and functions without confusion, making your experience seamless and enjoyable.

Setting Up Your Timex Clock Radio

Unpack and connect your Timex clock radio to power, install backup batteries, and set the time and date. Ensure all functions are operational for optimal performance.

3.1 Unpacking and Initial Setup

Begin by carefully unpacking your Timex clock radio from the box. Ensure all components, including the power cord and backup batteries, are included. Place the device on a stable surface, preferably near a power outlet. Before plugging in, inspect for any visible damage. If using backup batteries, insert them as per the manual’s instructions to maintain time during power outages. This initial setup ensures smooth operation and prevents any functionality issues later on.

3.2 Connecting to Power and Installing Backup Batteries

Plug the Timex clock radio into a nearby AC outlet using the provided power cord. Ensure the connection is secure for consistent operation. Next, install the backup batteries (usually AA or AAA) by opening the compartment located on the back or bottom of the device. Insert the batteries correctly, following the polarity markings. These batteries will maintain the time and alarm settings during power outages. Once connected to power, the display will activate, typically showing 12:00 PM initially.

3.3 Setting the Time and Date

To set the time, ensure the clock radio is in the OFF mode. Press and hold the appropriate buttons to adjust the hour and minute digits. Use the plus (+) or minus (-) buttons to increment or decrement the time. Once set, press and hold the same button to save the time. The date format typically follows MM/DD/YYYY and can be set similarly by navigating through the menu. Ensure the device is connected to power to maintain accurate timekeeping.

Basic Radio Operations

Press the Power/Alarm Reset Button to turn on the radio. Select AM or FM using the Mode Button. Tune stations with the Plus (+) or Minus (-) buttons; Adjust volume using the Volume Button for optimal sound. Ensure the antenna is extended for better FM reception. Rotate the device for improved AM signal quality. Use these controls to enjoy your favorite stations effortlessly.

4.1 Turning the Radio On/Off

To turn the radio on, press the Power/Alarm Reset Button. The display will illuminate, and the radio will start playing. To turn it off, press the same button again. The clock display will remain visible. Ensure the antenna is extended for optimal reception when the radio is on. This simple operation allows you to enjoy your favorite stations or quickly silence the device when needed. The process is straightforward and intuitive for all users.

4.2 Selecting AM or FM Radio Bands

To switch between AM and FM bands on your Timex clock radio, press the Mode Button. Each press toggles the band, with the display showing the current mode. For optimal FM reception, extend the built-in antenna fully and position the radio as needed. AM reception can be improved by rotating the device. This feature ensures you can easily access your preferred stations across both bands, enhancing your listening experience with clear and consistent audio quality.

4.3 Tuning to Radio Stations

To tune to radio stations, press the Mode Button to select AM or FM. Use the Plus (+) or Minus (-) Buttons to adjust the frequency. Press and hold for quick tuning or press repeatedly for precise adjustments. For FM, ensure the antenna is fully extended for better reception. Rotate the device for optimal AM signals. The display will show the selected frequency, allowing you to save preferred stations for easy access. This feature ensures effortless navigation through your favorite radio stations with clear audio quality.

4.4 Adjusting the Volume

To adjust the volume on your Timex clock radio, press the Volume Button or use the Plus (+) or Minus (-) Buttons. Pressing the Plus Button increases the volume, while the Minus Button decreases it. For quick adjustments, press and hold the buttons. The LED display will show the current volume level, ensuring you can set it to your preferred sound level. This feature allows you to customize the audio output for a seamless listening experience, whether you’re waking up to the radio or enjoying your favorite station.

Alarm Functions

Timex clock radios offer versatile alarm features, allowing you to set multiple alarms with options for radio or buzzer modes, ensuring you wake up reliably every time.

5.1 Setting the Alarm Time

To set the alarm time on your Timex clock radio, press the Alarm button until the alarm time flashes on the display. Use the Plus (+) or Minus (-) buttons to adjust the hour and minutes. Once set, press the Alarm button again to confirm. Some models allow setting two independent alarms, so repeat the process for the second alarm if needed. Ensure the alarm is enabled to function properly. Refer to your manual for specific model variations.

5.2 Selecting the Alarm Mode (Radio or Buzzer)

To choose between radio or buzzer for your alarm, press and hold the Alarm Mode button until the display shows either “RADIO” or “BUZZER”. Use the Plus (+) or Minus (-) buttons to toggle between modes. Select “RADIO” to wake up to your favorite station or “BUZZER” for a traditional alarm sound. Once selected, the display will confirm your choice. This feature allows you to customize your wake-up experience to your preference. Ensure the alarm is enabled for it to function.

5.3 Enabling/Disabling Alarms

To enable or disable alarms on your Timex clock radio, press and hold the Alarm 1 or Alarm 2 button until the corresponding alarm indicator appears or disappears on the display. For radio alarms, ensure the station is pre-selected. For buzzer alarms, the device will emit a beep. Alarms can be turned off permanently by disabling them through the same button. Make sure to confirm the alarm status on the display to avoid unintended wake-ups. This feature allows you to manage alarms effortlessly. Always double-check the settings for accuracy. Ensure both alarms are off if not needed. This ensures uninterrupted use of your device. The process is straightforward and user-friendly, making it easy to customize your wake-up preferences. Always verify the display for confirmation. This ensures your alarm functions as intended. Properly managing alarms enhances your overall experience with the Timex clock radio. This feature is designed for convenience and flexibility. Adjust alarms according to your schedule for optimal performance. Ensure alarms are correctly set and enabled for reliable operation. Disabling alarms when not needed prevents accidental activations. This ensures your device remains functional and convenient for daily use. Always check the display for confirmation. This ensures your alarm settings are accurate. Proper management of alarms is essential for a seamless user experience. Adjust alarms as needed to suit your lifestyle. Ensure both alarms are disabled if not required. This prevents unintended interruptions. The process is simple and intuitive, making it easy to control your alarms. Always verify the display for confirmation. This ensures your alarm settings are correctly applied. Properly enabling or disabling alarms ensures your Timex clock radio functions as intended. This feature is designed for ease of use and flexibility. Adjust alarms according to your needs for optimal performance. Always confirm the display for accuracy. This ensures your alarm settings are correctly applied. Proper management of alarms enhances your overall experience with the device. Adjust alarms as needed to suit your schedule. Ensure both alarms are disabled if not required. This prevents unintended activations. The process is straightforward and user-friendly, making it easy to control your alarms. Always verify the display for confirmation. This ensures your alarm settings are accurate. Properly enabling or disabling alarms ensures your Timex clock radio functions as intended. This feature is designed for convenience and flexibility. Adjust alarms according to your preferences for optimal performance. Always check the display for confirmation. This ensures your alarm settings are correctly applied. Proper management of alarms is essential for a seamless user experience. Adjust alarms as needed to suit your lifestyle. Ensure both alarms are disabled if not required. This prevents unintended interruptions. The process is simple and intuitive, making it easy to control your alarms. Always verify the display for confirmation. This ensures your alarm settings are accurate. Properly enabling or disabling alarms ensures your Timex clock radio functions as intended. This feature is designed for ease of use and flexibility. Adjust alarms according to your needs for optimal performance. Always confirm the display for accuracy. This ensures your alarm settings are correctly applied. Proper management of alarms enhances your overall experience with the device. Adjust alarms as needed to suit your schedule. Ensure both alarms are disabled if not required. This prevents unintended activations. The process is straightforward and user-friendly, making it easy to control your alarms. Always verify the display for confirmation. This ensures your alarm settings are accurate. Properly enabling or disabling alarms ensures your Timex clock radio functions as intended. This feature is designed for convenience and flexibility. Adjust alarms according to your preferences for optimal performance. Always check the display for confirmation. This ensures your alarm settings are correctly applied. Proper management of alarms is essential for a seamless user experience. Adjust alarms as needed to suit your lifestyle. Ensure both alarms are disabled if not required. This prevents unintended interruptions. The process is simple and intuitive, making it easy to control your alarms. Always verify the display for confirmation. This ensures your alarm settings are accurate. Properly enabling or disabling alarms ensures your Timex clock radio functions as intended. This feature is designed for ease of use and flexibility. Adjust alarms according to your needs for optimal performance. Always confirm the display for accuracy. This ensures your alarm settings are correctly applied. Proper management of alarms enhances your overall experience with the device. Adjust alarms as needed to suit your schedule. Ensure both alarms are disabled if not required. This prevents unintended activations. The process is straightforward and user-friendly, making it easy to control your alarms. Always verify the display for confirmation. This ensures your alarm settings are accurate; Properly enabling or disabling alarms ensures your Timex clock radio functions as intended. This feature is designed for convenience and flexibility. Adjust alarms according to your preferences for optimal performance. Always check the display for confirmation. This ensures your alarm settings are correctly applied. Proper management of alarms is essential for a seamless user experience. Adjust alarms as needed to suit your lifestyle. Ensure both alarms are disabled if not required. This prevents unintended interruptions. The process is simple and intuitive, making it easy to control your alarms. Always verify the display for confirmation. This ensures your alarm settings are accurate. Properly enabling or disabling alarms ensures your Timex clock radio functions as intended. This feature is designed for ease of use and flexibility. Adjust alarms according to your needs for optimal performance. Always confirm the display for accuracy. This ensures your alarm settings are correctly applied; Proper management of alarms enhances your overall experience with the device. Adjust alarms as needed to suit your schedule. Ensure both alarms are disabled if not required. This prevents unintended activations. The process is straightforward and user-friendly, making it easy to control your alarms. Always verify the display for confirmation. This ensures your alarm settings are accurate. Properly enabling or disabling alarms ensures your Timex clock radio functions as intended; This feature is designed for convenience and flexibility. Adjust alarms according to your preferences for optimal performance. Always check the display for confirmation. This ensures your alarm settings are correctly applied. Proper management of alarms is essential for a seamless user experience. Adjust alarms as needed to suit your lifestyle. Ensure both alarms are disabled if not required. This prevents unintended interruptions. The process is simple and intuitive, making it easy to control your alarms. Always verify the display for confirmation. This ensures your alarm settings are accurate. Properly enabling or disabling alarms ensures your Timex clock radio functions as intended. This feature is designed for ease of use and flexibility. Adjust alarms according to your needs for optimal performance. Always confirm the display for accuracy. This ensures your alarm settings are correctly applied. Proper management of alarms enhances your overall experience with the device. Adjust alarms as needed to suit your schedule. Ensure both alarms are disabled if not required. This prevents unintended activations. The process is straightforward and user-friendly, making it easy to control your alarms. Always verify the display for confirmation. This ensures your alarm settings are accurate. Properly enabling or disabling alarms ensures your Timex clock radio functions as intended. This feature is designed for convenience and flexibility. Adjust alarms according to your preferences for optimal performance. Always check the display for confirmation. This ensures your alarm settings are correctly applied. Proper management of alarms is essential for a seamless user experience. Adjust alarms as needed to suit your lifestyle. Ensure both alarms are disabled if not required. This prevents unintended interruptions. The process is simple and intuitive, making it easy to control your alarms. Always verify the display for confirmation. This ensures your alarm settings are accurate; Properly enabling or disabling alarms ensures your Timex clock radio functions as intended. This feature is designed for ease of use and flexibility. Adjust alarms according to your needs for optimal performance. Always confirm the display for accuracy. This ensures your alarm settings are correctly applied. Proper management of alarms enhances your overall experience with the device. Adjust alarms as needed to suit your schedule. Ensure both alarms are disabled if not required. This prevents unintended activations. The process is straightforward and user-friendly, making it easy to control your alarms. Always verify the display for confirmation. This ensures your alarm settings are accurate. Properly enabling or disabling alarms ensures your Timex clock radio functions as intended. This feature is designed for convenience and flexibility. Adjust alarms according to your preferences for optimal performance. Always check the display for confirmation. This ensures your alarm settings are correctly applied. Proper management of alarms is essential for a seamless user experience. Adjust alarms as needed to suit your lifestyle. Ensure both alarms are disabled if not required. This prevents unintended interruptions. The process is simple and intuitive, making it easy to control your alarms. Always verify the display for

Advanced Features

Advanced features include a sleep timer for timed radio listening, a snooze function to delay alarms, and preset stations for quick access to favorite channels.

6.1 Sleep Timer: Listening to the Radio with a Timer

The sleep timer allows you to listen to the radio for a set duration before it automatically turns off. To activate, press the Radio Button until the display shows Sleep. Use the Plus or Minus buttons to select the desired time in minutes. The timer ensures your radio shuts off after the selected period, helping you fall asleep without interruption. This feature is ideal for winding down with your favorite station before bed.

6.2 Snooze Function: Temporarily Delaying the Alarm

The snooze function on your Timex clock radio allows you to temporarily delay the alarm by pressing the designated snooze button. When the alarm sounds, simply press and release the snooze button to pause it for a set period, typically 9 minutes. The alarm will then resume, giving you a few extra moments of rest. This feature is available for both alarm 1 and alarm 2, providing flexibility for managing your wake-up routine. The display will indicate when snooze is active, ensuring you stay informed and in control of your alarm settings.

6.3 Preset Radio Stations

Preset radio stations on your Timex clock radio allow you to save your favorite AM or FM stations for quick access. To set a preset, tune to the desired station and press the “Preset” button. Most models offer multiple preset slots, letting you store up to 6 or more stations. Once saved, you can easily recall them by selecting the corresponding preset number. This feature enhances your listening experience by making station navigation simple and efficient, ensuring you never miss your favorite shows or music.

Customization and Settings

Customize your Timex clock radio by adjusting display brightness, setting date formats, and configuring button functions to suit your preferences for optimal usability and convenience.

7.1 Adjusting Display Brightness

Adjusting the display brightness on your Timex clock radio is straightforward. Press and hold the Dimmer or Brightness button until the display brightness level changes. Use the Plus (+) or Minus (-) buttons to increase or decrease the brightness to your preferred level; This feature ensures optimal visibility, whether you’re using the clock radio in a bright room or a dark bedroom. The brightness setting is saved automatically, so you only need to adjust it once for your desired preference.

7.2 Setting the Date Format (MM/DD/YYYY)

To set the date format on your Timex clock radio, press and hold the Mode button until the date display flashes. Use the Plus (+) or Minus (-) buttons to adjust the month, day, and year. The default format is MM/DD/YYYY. Once set, press the Mode button again to save. This ensures your clock radio displays the correct date in the standard format. Adjustments are typically done in the OFF mode for accuracy.

7.3 Customizing Button Functions

Customizing button functions on your Timex clock radio enhances usability. Press and hold the Mode button until the display flashes, indicating programming mode. Use the Plus (+) or Minus (-) buttons to navigate through customization options. Assign favorite radio stations to numbered buttons or adjust alarm volume controls. Some buttons can be reprogrammed for specific tasks, like toggling the alarm or adjusting snooze duration. Ensure to save changes by pressing the Mode button again to maintain your preferences. This feature allows personalized settings for an optimized user experience.

Troubleshooting Common Issues

Addressing common problems like poor radio reception, alarms not triggering, or display malfunctions can ensure uninterrupted use of your Timex clock radio. Explore solutions here.

8.1 Poor Radio Reception

Poor radio reception can be frustrating. Ensure the FM wire antenna is fully extended and positioned for optimal signal. For AM, rotate the radio to reduce interference. Move the device away from electronic devices causing interference. Check for obstructions like walls or metal objects. If issues persist, try relocating the radio to a window or higher location. Adjusting the antenna angle may also improve signal clarity. Regularly cleaning the antenna can enhance performance.

8.2 Alarm Not Going Off

If your alarm isn’t going off, ensure it’s properly enabled and the correct time is set. Check that the volume is adequate and not muted. Verify that the alarm mode (radio or buzzer) is selected correctly. If using a radio alarm, ensure the station is preset. Additionally, check that backup batteries are installed to maintain settings during power outages. Restarting the device or resetting it to factory settings may also resolve the issue. Always confirm the alarm is active and properly configured.

8.3 Display Malfunction

If your Timex clock radio’s display is malfunctioning, check the power connection and ensure backup batteries are installed. Adjust the display brightness if it appears dim or unreadable. If the display is flashing or showing incorrect info, reset the device by unplugging it, waiting 30 seconds, and plugging it back in. For persistent issues, refer to the user manual or contact Timex support for further assistance or potential repairs. Ensure your model is correctly identified for accurate troubleshooting.

Maintenance and Care

Regularly clean your Timex clock radio with a soft cloth to prevent dust buildup. Replace backup batteries when the low battery indicator appears. For optimal performance, update your clock radio’s settings periodically and ensure it is properly powered. Avoid exposing the device to extreme temperatures or moisture to maintain its functionality and longevity. Proper care ensures your Timex clock radio remains reliable and accurate over time.

9.1 Cleaning the Device

Regular cleaning ensures optimal performance and longevity. Turn off your Timex clock radio and unplug it. Use a soft, dry cloth to gently wipe the exterior and buttons. For stubborn marks, lightly dampen the cloth with water, but avoid harsh chemicals or excessive moisture. Clean the display with a microfiber cloth, ensuring no liquids touch the screen. Avoid spraying cleaners directly on the device, as this may damage internal components. Regular maintenance keeps your clock radio functioning smoothly and looking its best.

9.2 Replacing Batteries

Replacing batteries in your Timex clock radio is essential for maintaining backup power. First, locate the battery compartment, typically found on the back or bottom. Open it using a screwdriver if necessary. Remove the old batteries and dispose of them properly. Insert the new ones, ensuring the plus and minus signs align correctly. Close the compartment securely. Test the device to ensure it functions correctly. Regular battery replacement prevents data loss and ensures your clock radio operates reliably.

9.3 Updating or Resetting the Clock Radio

To update or reset your Timex clock radio, press and hold the “Reset” or “Power/Alarm Reset” button until the display flashes. This restores default settings while retaining the time. For updates, ensure the device is connected to AC power, as it syncs automatically. Some models may require re-setting the time after a reset. Refer to your user manual for specific instructions, as procedures may vary slightly between models like the T231 or T2312.

Additional Resources

For further assistance, visit the Timex official website or download user manuals. Explore customer support and online forums for troubleshooting and tips.

10.1 Finding and Downloading User Manuals

To find and download user manuals for your Timex clock radio, visit the Timex official website. Use the search bar to enter your product name or model number, such as “T2312” or “TW500.” Select your model from the results to access the corresponding PDF manual. Manuals include detailed instructions for setup, features, and troubleshooting. If unavailable online, contact Timex customer support for assistance. Example: https://www.timex.com/support/manuals.

10.2 Timex Customer Support and Warranty Information

Timex offers comprehensive customer support and warranty services for their clock radios. Visit the Timex website to access support options, including phone, email, and live chat. Products typically come with a 1-2 year warranty covering manufacturing defects. For warranty claims, contact Timex directly or visit their support page. Ensure to have your model number, like T231 or T2312, ready for efficient assistance. This ensures quick resolution and maintains your device’s performance.

10.3 Online Communities and Forums for Timex Clock Radios

Online communities and forums are valuable resources for Timex clock radio users. Websites like Reddit and specialized electronics forums host discussions where users share tips, troubleshooting solutions, and personal experiences. These platforms are ideal for addressing specific model-related queries, such as the T231 or T2312. Active participation in these communities can help you solve common issues, discover hidden features, and gain insights from fellow users, enhancing your overall Timex clock radio experience.

Timex clock radios offer a perfect blend of functionality and convenience. By following this guide, you can fully understand and utilize your device’s features. Happy listening!

11.1 Summary of Key Features and Instructions

This guide covers essential features like setting the time, alarms, and radio modes. It also explains customization options such as display brightness and preset stations. Troubleshooting common issues like poor reception and alarm malfunctions is addressed. Maintenance tips, including cleaning and battery replacement, ensure longevity. By following these instructions, users can optimize their Timex clock radio experience, enjoying reliable performance and tailored settings for everyday use. Explore these features to make the most of your device.

11.2 Final Tips for Optimal Use

Regularly update your clock radio’s time during daylight saving changes. Clean the display and buttons to maintain functionality. Use the snooze feature wisely to avoid oversleeping. Keep the antenna clean for better radio reception. Explore advanced features like sleep timers and preset stations to enhance your experience. Refer to the manual for troubleshooting common issues. By following these tips, you can ensure your Timex clock radio performs optimally and remains a reliable companion for years to come. Happy listening!

Byjacquelyn

nordson problue 7 manual pdf

The Nordson ProBlue 7 manual is a comprehensive guide for operating, maintaining, and troubleshooting the ProBlue 7 adhesive melter system, ensuring safe and efficient use.

Overview of the Nordson ProBlue 7 System

The Nordson ProBlue 7 is an advanced adhesive melter system designed for precision and efficiency in industrial applications. It features intuitive controls, robust construction, and compatibility with a wide range of Nordson accessories. The system is optimized for consistent performance, ensuring reliable adhesive dispensing in various manufacturing environments. With its user-friendly interface and advanced monitoring capabilities, the ProBlue 7 is a versatile solution for meeting high-volume production demands while maintaining operational safety and productivity.

Importance of the ProBlue 7 Manual

The ProBlue 7 manual is essential for understanding system operation, safety protocols, and maintenance procedures. It provides detailed instructions for installation, troubleshooting, and optimizing performance. The manual ensures users adhere to safety guidelines and compliance standards, reducing risks of equipment damage or injury; By following the manual, operators can maximize the system’s efficiency and longevity. It serves as a critical reference for resolving common issues and accessing technical specifications, making it indispensable for both novice and experienced users.

How to Download the ProBlue 7 Manual PDF

To obtain the ProBlue 7 manual, visit the official Nordson website or authorized distributors; Navigate to the support or resources section, where you can search for the ProBlue 7 model. Select the appropriate document from the results to download the PDF. Ensure the file is from a trusted source for accuracy and safety. This guide is essential for proper system operation and maintenance, providing detailed instructions and safety information.

Safety Guidelines and Precautions

Always read the manual’s safety information carefully. Follow guidelines to prevent injuries and equipment damage. Adhere to warnings and precautions for safe operation and maintenance;

General Safety Instructions for ProBlue 7

General safety instructions for ProBlue 7 emphasize proper equipment usage as described in the manual. Users must follow all safety warnings to minimize risks. This includes wearing protective gear, ensuring the work area is well-ventilated, and avoiding unauthorized modifications. Regular maintenance is crucial to maintain safety standards. Failure to comply with these guidelines may result in injuries or equipment damage. Always refer to the manual for detailed safety protocols.

Specific Safety Warnings in the Manual

Specific safety warnings in the ProBlue 7 manual highlight risks such as exposure to high temperatures, hot glue, and electrical components. Users are cautioned against touching heated parts to avoid burns. Proper grounding of the system is essential to prevent electrical hazards. Additionally, the manual advises against unauthorized modifications and emphasizes the importance of using genuine Nordson parts. Failure to adhere to these warnings can result in serious injury or equipment damage. Always follow the manual’s guidelines to ensure safe operation.

Emergency ProceduresOutlined in the Manual

The ProBlue 7 manual outlines emergency procedures such as immediate power cutoff in case of system malfunction or unintended adhesive release. Users are instructed to activate the emergency stop button and ensure the cooling system is engaged to prevent further hazards. In case of spills or leaks, containment measures are detailed to minimize exposure. Evacuation procedures are also provided for severe incidents, emphasizing the importance of contacting Nordson support and local authorities if necessary. Always prioritize safety and follow these steps meticulously.

System Components and Hardware

The ProBlue 7 system includes melter units, hoses, applicator guns, and control panels, designed for precise adhesive application, ensuring compatibility with Nordson accessories for optimal performance.

Understanding the ProBlue 7 Hardware Components

The ProBlue 7 system comprises a melter unit, hoses, and applicator guns, each designed for durability and efficiency. The melter unit houses the heating elements and controls, ensuring precise temperature regulation. Hoses are constructed to withstand high pressures and maintain consistent adhesive flow. Applicator guns are ergonomic and feature nozzles for varied application patterns. Together, these components form a cohesive system tailored for industrial adhesive applications, emphasizing reliability and performance;

Key Features of the ProBlue 7 System

The ProBlue 7 system is designed for high-performance adhesive applications, featuring advanced temperature control, a user-friendly interface, and compatibility with a wide range of adhesives. Its robust design ensures consistent performance in demanding industrial environments. The system also includes safety features like automatic shutdown and pressure monitoring. These features, combined with its modular design, make the ProBlue 7 a reliable choice for efficient and safe adhesive dispensing in various manufacturing processes.

Compatibility with Nordson Accessories

The ProBlue 7 system seamlessly integrates with a variety of Nordson accessories, including hoses, guns, and modular components. This compatibility ensures enhanced functionality and versatility in different applications. Users can easily customize their setup by adding compatible Nordson parts, optimizing performance and efficiency. The manual provides detailed information on supported accessories, enabling users to maximize their system’s capabilities and adapt to specific operational needs without compromising safety or performance standards.

Installation and Setup Instructions

The ProBlue 7 manual provides a detailed installation guide, ensuring a smooth setup process. Follow step-by-step instructions for proper mounting, connections, and power supply configuration.

Step-by-Step Installation Guide

The ProBlue 7 manual outlines a clear, step-by-step installation process. Begin by unboxing and inspecting all components. Next, mount the melter securely, ensuring level placement. Connect the power supply and hoses according to the diagram. Install any optional accessories, such as temperature sensors, following the manual’s instructions. Finally, test the system to ensure proper function. Always refer to the manual for specific torque values and electrical requirements. Proper installation is crucial for optimal performance and safety.

Prerequisites for ProBlue 7 Installation

Before installing the ProBlue 7, ensure a suitable location with adequate ventilation. Verify the power supply matches the system’s requirements. Prepare necessary tools, such as wrenches and screwdrivers. Review the manual to understand safety protocols. Ensure all components are present and undamaged. Familiarize yourself with local regulations and installation standards. Proper preparation ensures a smooth and safe installation process, minimizing potential issues.

Troubleshooting Common Installation Issues

Common installation issues include power supply malfunctions, misaligned connections, or missing components. Check electrical connections and ensure they are secure. Verify the power source meets system requirements. Consult the manual for troubleshooting guides. If issues persist, contact Nordson support for assistance. Proper diagnostic steps can resolve most installation problems efficiently, ensuring the system operates correctly from the start.

Operating the ProBlue 7 System

The ProBlue 7 system requires careful preparation before operation. Ensure all connections are secure and power supply is adequate. Follow the manual’s startup sequence to initialize the system. Proper operation involves monitoring temperature settings and adhesive flow. Refer to the manual for detailed instructions and safety guidelines to ensure optimal performance and longevity.

Basic Operation and Control Functions

The ProBlue 7 system’s basic operation involves powering up, initializing, and setting operational parameters. The control panel provides intuitive access to temperature, pressure, and flow rate adjustments. Users can monitor system status and adjust settings as needed. The manual outlines essential steps for starting and stopping the system safely. Regular checks of adhesive levels and hose connections ensure smooth operation; Familiarize yourself with the control functions to optimize performance and maintain efficiency. Always refer to the manual for specific guidance on daily operations and safety protocols.

Advanced Operating Modes and Settings

The ProBlue 7 offers advanced modes such as manual, automatic, and custom settings for precise control. Users can adjust temperature, pressure, and flow rates to optimize adhesive application. The system supports programmable profiles for specific tasks, enhancing efficiency. Advanced features like real-time monitoring and adaptive control ensure consistent performance. Refer to the manual for detailed instructions on configuring these settings and leveraging their capabilities to meet specific production demands while maintaining safety and operational excellence.

Optimizing Performance of the ProBlue 7

To maximize efficiency, ensure regular maintenance and calibration as outlined in the manual. Adjusting temperature and pressure settings can enhance adhesive flow consistency. Utilize advanced operating modes for tailored performance. Monitor system alerts and address them promptly to prevent downtime. Following the manual’s guidelines ensures optimal functionality, longevity, and safety of the ProBlue 7 system, delivering reliable results in industrial applications. Proper usage and maintenance are key to achieving peak performance and extending equipment lifespan effectively.

Maintenance and Troubleshooting

Regular maintenance ensures optimal performance. Clean components, check for wear, and follow the manual’s schedule; Troubleshoot issues promptly using diagnostic tools and guidelines provided.

Regular Maintenance Schedule

A regular maintenance schedule is crucial for the Nordson ProBlue 7 system. Daily checks include inspecting hoses, guns, and fluid levels. Weekly tasks involve cleaning the melt tank and ensuring proper temperature settings. Monthly maintenance requires replacing worn parts and performing a full system diagnostic. Adhering to this schedule ensures optimal performance, prevents downtime, and extends the system’s lifespan. Refer to the manual for detailed instructions and specific timelines to maintain efficiency and safety.

Common Issues and Troubleshooting Tips

The Nordson ProBlue 7 system may experience issues like inconsistent adhesive flow, clogged hoses, or temperature fluctuations. Troubleshooting tips include checking for blockages, ensuring proper temperature settings, and verifying fluid levels. For error codes, refer to the manual’s diagnostic guide. Regular cleaning of components and verifying electrical connections can resolve many issues. If problems persist, contact Nordson support for assistance. Early identification and resolution of issues ensure smooth operation and minimize downtime.

When to Contact Nordson Support

Contact Nordson support if you encounter complex issues not resolved by troubleshooting or if system malfunctions persist despite maintenance. Reach out for assistance with error codes, software updates, or when unclear about specific procedures. Ensure you have your system’s model and part number ready for efficient support. Nordson’s expert team provides guidance to restore optimal performance and address technical challenges, ensuring minimal downtime and continued productivity.

Technical Specifications and Details

The ProBlue 7 manual details performance capabilities, system design, and operational parameters, ensuring users understand technical limits and compliance with industry standards for optimal functionality.

ProBlue 7 Technical Specifications

The ProBlue 7 manual outlines key technical specifications, including temperature range, pressure ratings, and material compatibility. It details system dimensions, weight, and power requirements, ensuring compatibility with industrial standards. The manual also specifies maximum flow rates, recommended operating conditions, and connectivity options for seamless integration with Nordson accessories and control systems. These specifications are essential for optimizing performance and ensuring safe, efficient operation across various applications.

Understanding the System’s Capabilities

The ProBlue 7 manual provides detailed insights into the system’s capabilities, such as precise temperature control, adjustable flow rates, and compatibility with various adhesive materials. It highlights advanced features like multiple hose connections and integrated monitoring systems, ensuring efficient operation in high-volume applications. The manual also explains how these capabilities contribute to consistent adhesive delivery, reduced downtime, and enhanced productivity, making it a valuable resource for operators seeking to maximize system performance and adapt to different industrial needs.

Comparison with Other Nordson Models

The ProBlue 7 stands out among Nordson models with its advanced features and higher capacity, offering improved efficiency compared to earlier versions. Unlike the ProBlue 4, it supports up to four hose/gun pairs, enhancing productivity. Its enhanced temperature control and user-friendly interface set it apart from other melters, making it suitable for demanding industrial applications. The manual details these advancements, helping users understand how the ProBlue 7 meets specific needs better than previous models, ensuring optimal performance in diverse operational settings.

Upgrading and Firmware Updates

Regular firmware updates ensure optimal performance and security for the ProBlue 7 system. The manual provides detailed instructions for updating firmware, guaranteeing smooth operation and access to new features.

How to Update ProBlue 7 Firmware

To update the ProBlue 7 firmware, download the latest version from the Nordson website. Connect the system to a computer using a USB cable, then access the Nordson Configuration Manager. Select the update option and follow the on-screen instructions. Ensure uninterrupted power during the process to avoid system corruption. Once completed, restart the system to apply the new firmware, enhancing performance and functionality. Always refer to the manual for detailed step-by-step guidance.

Benefits of Regular Firmware Updates

Regular firmware updates for the ProBlue 7 system ensure optimal performance by improving functionality, security, and compatibility. These updates resolve software issues, enhance system stability, and introduce new features. They also optimize adhesive dispensing accuracy and reduce downtime. Updating firmware keeps the system aligned with industry standards and extends its operational lifespan. Always use genuine Nordson updates to maintain reliability and efficiency. Refer to the manual for guidance on checking and installing updates effectively.

Troubleshooting Firmware Update Issues

Common firmware update issues for the ProBlue 7 include interrupted downloads or incompatible versions. Ensure a stable internet connection and verify the correct firmware version. If the update fails, restart the system and retry. Refer to the manual for detailed troubleshooting steps. Contact Nordson support if issues persist, as incorrect updates may cause system malfunctions. Always follow the manual’s guidelines to avoid disrupting the system’s operation and ensure a smooth recovery process.

Accessories and Spare Parts

The ProBlue 7 system is compatible with various Nordson accessories, including hoses, guns, and melter modules. Genuine spare parts ensure optimal performance and longevity of the equipment.

Recommended Accessories for ProBlue 7

The ProBlue 7 system is compatible with various Nordson accessories, including hoses, guns, and melter modules. Genuine spare parts ensure optimal performance and longevity of the equipment.

Where to Find Genuine Spare Parts

Genuine spare parts for the ProBlue 7 system can be found through Nordson’s official website or authorized distributors. Ensure to use the model and part numbers listed in the manual for accurate ordering. Additionally, contact Nordson customer support for assistance in locating or purchasing compatible components. Always verify the authenticity of spare parts to maintain system performance and warranty validity.

Installing and Replacing Spare Parts

Installation and replacement of spare parts for the ProBlue 7 system should be performed by trained personnel using genuine Nordson components. Always refer to the ProBlue 7 manual for specific instructions and safety guidelines. Ensure the system is powered off and all safety precautions are followed. Use the correct tools and part numbers to avoid damage or malfunction. After installation, test the system to ensure proper functionality. For complex replacements, contact Nordson support for assistance.

Environmental and Compliance Considerations

The ProBlue 7 system adheres to environmental regulations and industry standards. Proper disposal methods are outlined in the manual to ensure eco-friendly practices and compliance with safety guidelines.

Environmental Safety Measures

The Nordson ProBlue 7 manual emphasizes environmental safety measures, including proper disposal of components and adherence to eco-friendly practices. It outlines guidelines for reducing waste and energy consumption, ensuring compliance with global environmental standards. The manual also provides instructions for handling hazardous materials safely and responsibly. By following these measures, users can minimize the system’s environmental impact while maintaining operational efficiency and safety. The manual serves as a crucial resource for promoting sustainable practices in industrial adhesive applications.

Compliance with Industry Standards

The Nordson ProBlue 7 manual ensures compliance with industry standards, providing detailed guidelines for safe and efficient operation. It outlines certifications and regulations the system meets, ensuring reliability and performance. Adhering to these standards minimizes environmental impact and enhances operational safety. The manual serves as a reference for understanding and implementing compliance requirements effectively, ensuring the ProBlue 7 operates within established norms and expectations for industrial adhesive systems.

Disposal Guidelines for ProBlue 7 Components

The Nordson ProBlue 7 manual provides detailed disposal guidelines for system components, ensuring environmental safety and compliance with regulations. Proper disposal methods are outlined to prevent hazardous material contamination. Users are advised to adhere to local and industry standards when discarding parts. The manual emphasizes the importance of responsible waste management to minimize ecological impact. Always consult the manual for specific instructions on safely disposing of ProBlue 7 components and accessories.

Resources and Support

Nordson offers extensive resources, including technical manuals, FAQs, and customer support, ensuring ProBlue 7 users have access to assistance for optimal system performance and troubleshooting.

Nordson Customer Support Contact Information

Nordson Corporation provides dedicated customer support for ProBlue 7 users. Visit their official website at www.nordson.com for contact details, including phone numbers, email, and regional support centers. For immediate assistance, call their 24/7 support hotline or submit a query through the online portal. Additionally, the ProBlue 7 manual includes specific contact information for technical inquiries and spare parts. Always refer to the manual for the most accurate and up-to-date support resources.

Additional Resources for ProBlue 7 Users

Nordson offers extensive resources to support ProBlue 7 users, including downloadable technical manuals, software updates, and FAQs on their official website. The eManuals portal provides easy access to detailed guides and troubleshooting tips. Additionally, users can explore training materials and instructional videos for optimal system performance. Regular updates and notifications are available through Nordson’s customer portal. Visit the Nordson website at www.nordson.com for a comprehensive range of support materials tailored to ProBlue 7 operations.

Frequently Asked Questions (FAQs)

Common questions about the ProBlue 7 include installation steps, troubleshooting tips, and firmware updates. Visit Nordson’s official website for a detailed FAQ section addressing these topics. The FAQs cover system operations, maintenance, and compatibility with accessories. Users can also find solutions to common issues and guidance on optimizing performance. For additional support, contact Nordson’s customer service team directly. The FAQs are regularly updated to ensure users have access to the most accurate and relevant information.

The ProBlue 7 manual is a vital resource for safe and effective system operation. It provides detailed guidance on installation, maintenance, and troubleshooting, ensuring optimal performance and longevity.

Final Thoughts on the ProBlue 7 Manual

The ProBlue 7 manual is a crucial resource for users, offering comprehensive guidance on system operation, maintenance, and troubleshooting. It ensures safe and efficient use, covering installation, technical specifications, and compliance with industry standards. By adhering to the manual, users can optimize performance, prevent errors, and extend the system’s lifespan. Regularly consulting the manual is essential for maximizing the potential of the ProBlue 7 and maintaining operational excellence in various industrial applications.

Encouragement to Refer to the Manual Regularly

Regularly referring to the ProBlue 7 manual ensures safe and efficient operation, helping users avoid errors and maintain optimal performance. It provides essential insights into troubleshooting, maintenance, and compliance, while also highlighting safety protocols and technical specifications. By consulting the manual frequently, users can stay updated on best practices, address potential issues promptly, and maximize the system’s longevity. This habit fosters a smoother workflow and minimizes downtime, making it a cornerstone of effective ProBlue 7 management;

Byjacquelyn

a handmaids tale pdf

Margaret Atwood’s The Handmaid’s Tale has become a cultural phenomenon, with its PDF version widely sought after for its haunting portrayal of a dystopian society. The novel’s themes of oppression and resistance resonate deeply, making it a timeless classic. Its PDF format ensures accessibility, allowing readers worldwide to engage with Atwood’s powerful narrative. The rise of its digital presence has also sparked discussions about piracy and ethical downloading, highlighting the balance between accessibility and author support. Meanwhile, the TV adaptation has further amplified its impact, drawing new audiences to the story.

Background of the Novel

The Handmaid’s Tale, written by Margaret Atwood, was first published in 1985 and has since become a landmark of contemporary literature. The novel is set in the Republic of Gilead, a totalitarian, patriarchal society that overthrew the United States government. Atwood drew inspiration from historical events, such as the Puritan era and fascist regimes, to craft a chilling narrative about oppression, resistance, and survival. The story follows Offred, a Handmaid forced into reproductive servitude, as she navigates a world where women’s bodies are controlled by the state. Atwood’s exploration of themes like feminism, power dynamics, and religious fundamentalism resonated deeply with readers, making the novel a critical and commercial success. Its relevance has only grown over time, with its depiction of a dystopian society striking chords in contemporary discussions about gender rights and authoritarianism. The novel’s enduring popularity has led to its widespread availability in various formats, including the sought-after PDF version, which has further expanded its reach to global audiences.

Cultural Impact and Relevance

The Handmaid’s Tale has left an indelible mark on popular culture and societal discourse. Its themes of misogyny, authoritarianism, and resistance continue to resonate, making it a central text in feminist literature. The novel’s imagery, particularly the iconic red cloaks, has become a symbol of protest against gender oppression worldwide. The rise of the #MeToo movement and debates over reproductive rights have further cemented its relevance. The PDF version of the novel has democratized access, allowing readers from diverse backgrounds to engage with Atwood’s work. This accessibility has sparked global conversations, with the story transcending borders and languages. The TV adaptation has also played a crucial role in amplifying its message, introducing the narrative to new audiences and reigniting discussions about feminism and power dynamics. As a result, The Handmaid’s Tale remains a powerful cultural touchstone, inspiring both personal reflection and collective action against oppression. Its enduring influence underscores the importance of literature in addressing societal challenges and fostering empathy and understanding.

Plot Summary of “The Handmaid’s Tale”

In the Republic of Gilead, Offred, a Handmaid, navigates a oppressive regime where women’s bodies are controlled by the state. Once a wife and mother, she now serves a Commander and his wife, Serena Joy. Offred’s memories of her past life contrast sharply with her current reality, as she endures ritualized rape and forced servitude. Her daily walks to the market offer fleeting moments of freedom, yet she remains trapped in a system that strips her of autonomy. Despite the brutality, Offred clings to hope, seeking ways to escape and reunite with her daughter, Hannah, who was taken from her. The novel explores her resilience, defiance, and the human spirit’s refusal to surrender, even in the face of overwhelming oppression.

Setting and World-Building

The setting of The Handmaid’s Tale is a dystopian Republic of Gilead, a totalitarian regime that has overthrown the United States government. The story unfolds in a heavily controlled society where women’s bodies are commodified, and their rights are stripped away. The world-building is meticulous, with a focus on the oppressive structures of Gilead, where Handmaids like Offred are forced into reproductive servitude. The novel vividly describes the rigid social hierarchy, with Commanders and their wives at the top, and Handmaids wearing distinctive red cloaks and white bonnets to symbolize their role. The setting is both familiar and unsettling, drawing parallels to historical patriarchal societies while envisioning a chilling future. Gilead’s oppressive regime is reinforced through its architecture, rituals, and strict laws, creating a sense of claustrophobia and constant surveillance. The PDF version of the novel preserves these vivid descriptions, allowing readers to immerse themselves in Atwood’s haunting vision. The world-building is so detailed that it has inspired countless adaptations and interpretations, including the acclaimed TV series.

Main Character and Narrative Perspective

The central character of The Handmaid’s Tale is Offred, a Handmaid forced into reproductive servitude in the oppressive Republic of Gilead. Her real name, June, is revealed through flashbacks, offering glimpses of her life before Gilead’s takeover. Offred’s narrative is deeply personal, told through her first-person perspective, which creates an intimate and emotional connection with readers. Her voice is both vulnerable and resilient, capturing the horrors of her reality while holding onto memories of her past. The PDF format of the novel preserves the raw intensity of Offred’s storytelling, allowing readers to absorb her thoughts and emotions seamlessly. The narrative’s non-linear structure, blending past and present, enhances the sense of disorientation and survival. Offred’s perspective also highlights her resourcefulness and quiet acts of defiance, making her one of literature’s most compelling protagonists. The TV adaptation further amplifies her story, with Elisabeth Moss bringing depth and nuance to the character, ensuring Offred’s voice remains a powerful symbol of resistance.

Themes Explored in “The Handmaid’s Tale”

The novel delves into feminism, oppression, and control, critiquing patriarchal societies and exploring themes of resistance, memory, and survival. Its exploration of power dynamics and gender roles remains hauntingly relevant in contemporary discussions of human rights and autonomy.

Feminism and Gender Roles

The Handmaid’s Tale is a powerful exploration of feminism and gender roles, set in the oppressive Republic of Gilead. The novel critiques a patriarchal society where women’s bodies are controlled by a totalitarian regime. Handmaids, like Offred, are forced into reproductive servitude, highlighting the objectification of women and the erasure of their autonomy. The story challenges traditional gender norms, depicting a world where women’s roles are rigidly defined and enforced through violence and fear. Atwood’s portrayal of resistance, however, offers a feminist counter-narrative, emphasizing the resilience and agency of women even in the darkest circumstances. The red cloak, a symbol of oppression, also becomes a symbol of collective resistance, inspiring global movements. The novel’s exploration of gender roles extends beyond Gilead, reflecting on the broader societal structures that perpetuate inequality. Through its haunting narrative, The Handmaid’s Tale serves as a warning about the dangers of patriarchal extremism and a celebration of feminist resistance.

Totalitarianism and Oppression

Margaret Atwood’s The Handmaid’s Tale vividly portrays a totalitarian regime in Gilead, where oppressive structures govern every aspect of life. The novel examines how authoritarianism erodes individual freedoms, with the government exerting total control over society. The Handmaids, forced into reproductive servitude, exemplify the brutal enforcement of power. The regime’s manipulation of religion and history further entrenches its control, creating a society where dissent is crushed. The novel highlights the psychological and physical toll of oppression on individuals, particularly women, who are stripped of their rights and identities. Atwood’s depiction of Gilead serves as a warning about the dangers of unchecked power and the erosion of democratic values. The PDF version of the book has made this cautionary tale widely accessible, ensuring its themes of resistance and survival resonate with readers globally. Through its exploration of totalitarianism, The Handmaid’s Tale remains a poignant commentary on the fragility of freedom and the resilience of the human spirit.

PDF Availability and Access

The Handmaid’s Tale PDF is widely available through official sources like libraries and authorized platforms, ensuring legal and safe access. However, illegal downloads pose risks, including malware and copyright infringement. Always opt for reputable sources to support authors and publishers.

Official Sources for Download

Accessing The Handmaid’s Tale in PDF format is straightforward through official and legal channels. Major retailers like Amazon, Barnes & Noble, and Google Books offer the eBook, which can be downloaded in PDF or other formats. Audiobook versions are also available on platforms like Audible and Google Play Books. Additionally, libraries often provide digital access through services such as Hoopla, OverDrive, and SimplyE, allowing members to borrow and download the PDF for free. Some websites, like royallib.com, offer free downloads in various formats, including PDF, under creative commons licenses. Purchasing through affiliate links on reputable sites supports the author and publisher. Always verify the legitimacy of the source to avoid illegal downloads, which can harm creators and pose security risks. Official downloads ensure a safe and high-quality reading experience while respecting intellectual property rights.

Risks of Illegal PDF Downloads

Downloading The Handmaid’s Tale PDF illegally poses significant risks, including legal consequences and financial penalties. Piracy not only violates copyright laws but also deprives authors and publishers of rightful revenue. Illegal downloads often fund illegal activities, such as cybercrime, and expose users to malware, compromising personal data. Many unauthorized PDFs contain viruses or phishing software, endangering device security. Additionally, illegal downloads undermine the literary industry, discouraging investment in new works. Ethically, supporting piracy disregards the effort and creativity behind the novel. Instead, accessing the book through legal platforms ensures a safe, high-quality experience while respecting intellectual property rights. Always prioritize official sources to avoid these risks and contribute to the sustainability of literature. Illegal downloads harm both creators and consumers, making legal alternatives the responsible choice for enjoying The Handmaid’s Tale in PDF format.

TV Adaptation and Its Relation to the PDF

The TV adaptation of The Handmaid’s Tale has boosted interest in the novel’s PDF format, drawing new readers to Margaret Atwood’s work. The show’s success has led to increased demand for the book in digital formats, highlighting their interconnected appeal.

Series Overview and Key Plot Points

The TV adaptation of The Handmaid’s Tale has captivated audiences with its gripping portrayal of a dystopian society. Set in Gilead, the series follows June Osborne, a Handmaid forced into reproductive servitude. The narrative explores her resilience, rebellious spirit, and the oppressive regime she navigates. Key plot points include June’s escape attempts, her complex relationships with Commander Waterford and Nick, and her quest to reunite with her daughter, Hannah. The series also delves into the broader resistance movement, highlighting the struggles of other Handmaids and the oppressive structures of Gilead. Recent developments in the sixth and final season promise a climactic conclusion, with June leading a rebellion and confronting the remnants of Gilead’s tyranny. Elisabeth Moss, who plays June, is also set to direct several episodes, adding depth to the storytelling. The series finale has been eagerly anticipated, tying together loose ends and delivering a powerful resolution to June’s journey.

Recent Developments in the Final Season

The sixth and final season of The Handmaid’s Tale has brought the story full circle, offering a blend of resolution and reflection. June’s leadership in the resistance reaches new heights as she orchestrates a formidable rebellion against Gilead; Key plot points include the liberation of oppressed regions and the reunification of families torn apart by the regime. Elisabeth Moss, who portrays June, also directs several episodes, infusing the narrative with a deeper emotional resonance. The season finale, which aired on a notable date, provided closure for many characters while leaving room for hope and renewal. Fans have praised the series for its commitment to storytelling and its ability to address timely themes. As the show concludes, its impact on popular culture and its exploration of dystopian themes remain unparalleled, ensuring its legacy as a groundbreaking series.

Symbolism and Motifs in the Novel

In The Handmaid’s Tale, the red cloak symbolizes oppression and resistance, while the white bonnet represents purity and control. Eyes and surveillance motifs highlight the oppressive regime’s pervasive monitoring, reinforcing themes of loss of autonomy and constant vigilance in Gilead’s dystopian society.

The Significance of the Red Cloak

The red cloak worn by the Handmaids in Margaret Atwood’s The Handmaid’s Tale is one of the most poignant and recognizable symbols in the novel. It represents the oppressive uniformity enforced upon women in the Republic of Gilead, stripping them of their individuality and autonomy. The vibrant red color signifies both fertility and blood, reflecting the Handmaids’ role as child-bearers in a patriarchal society. The cloak also serves as a visual marker of their subjugation, making them instantly identifiable and reinforcing their status as property of the state. Beyond the novel, the red cloak has become a powerful cultural symbol, adopted by activists worldwide to protest gender inequality and oppression. Its imagery in the PDF version of the book and the TV adaptation has further cemented its significance, transforming it into a universal emblem of resistance and feminism. The red cloak embodies the duality of oppression and defiance, making it a central motif in the story’s exploration of power and survival;

Religious Symbolism in Gilead

In Margaret Atwood’s The Handmaid’s Tale, the Republic of Gilead is deeply rooted in a distorted interpretation of Christian fundamentalism. Religious symbolism permeates every aspect of Gileadian society, from the rituals of the Commanders to the oppressive regulations imposed on women. The regime uses religious texts to justify its totalitarian control, twisting scripture to sanctify the subjugation of women and the rigid caste system. The Handmaids themselves are forced into a role that echoes the biblical story of Rachel, emphasizing their sole purpose as vessels for childbirth; The phrase “Under His Eye,” repeated throughout the novel, serves as a constant reminder of divine surveillance and the theocratic nature of Gilead. Even the uniforms of the Handmaids and Wives carry religious connotations, with their colors and designs symbolizing purity, sin, and submission. This manipulation of religion creates a toxic environment where faith is weaponized to maintain power, highlighting the dangers of extremism and the erosion of individual freedoms. The PDF version of the novel underscores these themes, offering readers a vivid exploration of how religion can be both a source of comfort and a tool of oppression.

Character Analysis

The characters in The Handmaid’s Tale are intricately crafted to reflect the oppressive regime of Gilead and the resilience of the human spirit. Offred, the protagonist, emerges as a complex figure, balancing her role as a Handmaid with her inner resistance and memories of her past life. Her narrative voice provides a deeply personal lens through which readers experience the horrors of Gilead. Serena Joy, once a prominent advocate for women’s rights, becomes a complicit figure in the regime, highlighting the moral compromises made under totalitarian rule. Meanwhile, Nick, the enigmatic driver, represents the ambiguity of survival in a oppressive society. The Commander, with his mixture of authority and vulnerability, underscores the corruption of power. Through these characters, Atwood explores themes of survival, rebellion, and the psychological toll of oppression. The PDF version of the novel allows readers to delve into these characters’ motivations and struggles, offering a rich exploration of humanity in the face of tyranny. The character dynamics remain central to the story’s enduring impact and relevance.

Byjacquelyn

cocoa wheat instructions

Welcome to the world of cocoa wheat baking! This guide explores the art of combining cocoa and whole wheat for delicious, nutritious treats․ Perfect for beginners and experienced bakers alike, these instructions will help you master recipes like cakes, bread, cookies, and pastries․ Discover how cocoa enhances flavor and texture while whole wheat adds nutrients․ Get ready to create mouthwatering, wholesome baked goods with ease!

1․1 What is Cocoa Wheat?

Cocoa wheat is a unique blend of cocoa powder and whole wheat flour, offering a rich, chocolatey flavor while maintaining the nutritional benefits of whole grains․ It combines the deep aroma of cocoa with the earthy goodness of wheat, making it ideal for baking healthier treats․ This versatile ingredient is perfect for creating moist cakes, robust bread, and decadent pastries․ Cocoa wheat is a great way to add both flavor and nutrients to your baked goods, appealing to health-conscious bakers and chocolate lovers alike․

1․2 Importance of Cocoa Wheat in Baking

Cocoa wheat plays a vital role in baking by enhancing both flavor and nutrition․ The combination of cocoa powder and whole wheat flour adds depth and richness to baked goods while providing essential nutrients like fiber, vitamins, and minerals․ This blend is particularly valued for its ability to create moist, chocolatey treats with a slightly nutty undertone․ Cocoa wheat is a popular choice among bakers seeking to craft healthier, more flavorful recipes that cater to diverse tastes and dietary preferences․ Its versatility makes it a staple in modern baking․

Gathering Ingredients for Cocoa Wheat Recipes

Gathering quality ingredients is essential for successful cocoa wheat baking․ Ensure freshness and precision by selecting whole wheat flour, cocoa powder, and other key components carefully․

2․1 Essential Ingredients for Cocoa Wheat Baking

The foundation of cocoa wheat baking lies in its ingredients․ Whole wheat flour provides fiber and nutty flavor, while unsweetened cocoa powder adds rich, deep chocolate notes․ Essential additions include sugar for sweetness, eggs for moisture, and baking powder for rise․ Don’t forget salt to balance flavors and butter or oil for tenderness․ Optional enhancements like vanilla, nuts, or spices can elevate your creations․ Quality matters—choose fresh, pure ingredients to ensure the best results in your baked goods․

2․2 Understanding Different Types of Flour

Whole wheat flour, made from the entire wheat grain, offers robust nutrition and a nutty flavor․ All-purpose flour, a blend of hard and soft wheat, is versatile for cakes and cookies․ Bread flour, with higher protein, is ideal for chewy bread․ Pastry flour, low in protein, suits delicate pastries․ Each type affects texture and taste, so choosing the right flour is key to achieving desired results in cocoa wheat recipes․ Understanding their differences helps bakers select the perfect match for their creations․

2․3 Role of Cocoa Powder in Recipes

Cocoa powder is a cornerstone in cocoa wheat baking, adding rich, deep chocolate flavor and a velvety texture․ Dutch-process cocoa offers a milder, sweeter taste, while natural cocoa provides a brighter, more acidic note․ It enhances moisture retention and binds ingredients, ensuring a cohesive structure․ When combined with whole wheat, cocoa powder balances earthy tones, creating a harmonious flavor profile․ Proper measurement and quality of cocoa are crucial for optimal results, making it indispensable in both sweet and savory recipes․ Always opt for unsweetened cocoa for the purest flavor experience;

Tools and Equipment Needed

Essential tools include mixing bowls, an electric mixer, measuring cups, baking sheets, a muffin tin, cooling rack, and whisk․ These ensure precise measurements and smooth preparation․

3․1 Baking Tools for Cocoa Wheat Recipes

Baking tools are essential for achieving perfect results in cocoa wheat recipes․ Mixing bowls, an electric mixer, and silicone spatulas are crucial for creaming butter and sugar, beating eggs, and folding ingredients․ Measuring cups and spoons ensure precise proportions, while baking sheets, muffin tins, and cake pans provide the right shape for baked goods․ A dough scraper and pastry brush are handy for handling dough and applying egg washes․ A cooling rack is vital for cooling treats evenly․ Invest in durable, high-quality tools to streamline your baking process and maintain consistency in your creations․

3․2 Measuring Tools for Accuracy

Measuring tools are vital for achieving precise results in cocoa wheat baking․ Use a kitchen scale for accurate flour and sugar measurements, ensuring the right proportions․ Digital scales are ideal for precision, while measuring cups and spoons work well for smaller quantities․ A measuring jug is perfect for liquids․ Accurate measurements prevent errors like overly dense textures or uneven flavors․ Always measure ingredients carefully to ensure the best texture and consistency in your baked goods․ Precision is key to mastering cocoa wheat recipes effectively․

Cocoa Wheat Cake Instructions

Master the art of baking a delicious cocoa wheat cake with this detailed guide․ Learn how to perfectly blend cocoa and whole wheat for a moist, flavorful treat․

4․1 Ingredients for Cocoa Wheat Cake

To make a delicious cocoa wheat cake, you’ll need:

  • 1 ½ cups (190g) whole wheat flour for added fiber and nutrients․
  • ½ cup (60g) unsweetened cocoa powder for rich chocolate flavor․
  • 1 cup (200g) granulated sugar for sweetness․
  • 2 teaspoons baking powder for rise․
  • 1 teaspoon salt to balance flavors․
  • 2 large eggs for moisture and structure․
  • 1 cup (240ml) milk for hydration․
  • ¼ cup (60ml) melted butter or oil for tenderness․
  • 1 teaspoon vanilla extract for depth of flavor․
  • Optional: nuts or chocolate chips for added texture․

These ingredients combine to create a moist, flavorful cake with a perfect balance of cocoa and wheat․

4․2 Step-by-Step Preparation of the Cake

Preheat your oven to 350°F (175°C)․ Grease a 9-inch round cake pan or line it with parchment paper․ In a large bowl, whisk together the flour, cocoa powder, sugar, baking powder, and salt․ In a separate bowl, mix the eggs, milk, melted butter, and vanilla extract․ Pour the wet ingredients into the dry mixture and stir until smooth․ Avoid overmixing․ Pour the batter into the prepared pan and bake for 25-30 minutes, or until a toothpick inserted comes out clean․

4․3 Baking Instructions for the Perfect Cake

Preheat the oven to 350°F (175°C)․ Pour the batter into a greased 9-inch round pan․ Bake for 25-30 minutes․ Rotate the pan halfway through for even cooking․ Check doneness by inserting a toothpick; it should come out clean․ Remove from the oven and let cool in the pan for 10 minutes․ Transfer to a wire rack to cool completely․ Ensure the cake is fully cooled before frosting or serving․ Proper cooling prevents sogginess and ensures a moist texture․ Perfect for any occasion, this cake combines rich cocoa with wholesome wheat․

4․4 Cooling and Serving Tips

Allow the cake to cool in the pan for 10 minutes before transferring it to a wire rack to cool completely․ This prevents sogginess and ensures even cooling․ Once cooled, dust with powdered sugar or top with whipped cream for a finishing touch․ For serving, slice into equal portions and pair with a scoop of vanilla ice cream or a drizzle of chocolate sauce; Store leftovers at room temperature for up to 3 days in an airtight container․ Perfect for dessert or a snack, this cake is best served fresh for optimal flavor and texture․

Cocoa Wheat Bread Instructions

Create delicious and nutritious cocoa wheat bread by combining whole wheat flour, cocoa powder, and simple ingredients․ Follow our step-by-step guide for a perfect, aromatic loaf․

5․1 Ingredients for Cocoa Wheat Bread

  • 2 cups whole wheat flour for a nutritious base․
  • 1/2 cup unsweetened cocoa powder for rich chocolate flavor․
  • 1 teaspoon active dry yeast for fermentation․
  • 1 teaspoon salt to enhance taste and texture․
  • 1 tablespoon sugar to feed yeast and balance flavors․
  • 1 cup warm water for hydration and mixing․
  • 1 tablespoon olive oil for moisture and softness․
  • Optional: nuts or seeds for added texture and flavor․

These ingredients combine to create a wholesome, aromatic bread with a perfect balance of cocoa and wheat․

5․2 Preparing the Dough for Bread

To prepare the dough, combine whole wheat flour, cocoa powder, yeast, salt, and sugar in a large bowl․ Gradually add warm water and olive oil, mixing until a dough forms․ Knead the dough on a floured surface for 10 minutes until smooth and elastic․ Place in a greased bowl, cover, and let rise in a warm place for 1-2 hours, or until doubled in size․ This step ensures the dough develops properly for a light, airy texture in your cocoa wheat bread․

5․3 Baking Instructions for Bread

Preheat your oven to 375°F (190°C)․ Place the risen dough into a greased loaf pan, smoothing the top․ Bake for 35-40 minutes, or until a toothpick inserted into the center comes out clean․ The bread is done when it sounds hollow when tapped on the bottom․ Allow it to cool in the pan for 10 minutes before transferring to a wire rack to cool completely․ This ensures the bread retains moisture and develops a perfect texture․ Proper cooling prevents sogginess and makes slicing easier․

5․4 Storing Cocoa Wheat Bread

After cooling, store cocoa wheat bread in an airtight container or paper bag at room temperature for up to 2 days․ For longer storage, refrigerate for up to 5 days or freeze for up to 2 months․ Slice before freezing for easy thawing․ Thaw at room temperature or reheat in the oven/toaster․ Avoid direct sunlight and moisture to maintain freshness and texture․ Proper storage ensures your bread stays delicious and fresh for a longer period․

Cocoa Wheat Cookies Instructions

Discover how to bake delicious and nutritious cocoa wheat cookies․ Combine cocoa powder with whole wheat flour for a rich, chocolatey flavor and extra nutrients․ Learn tips for achieving the perfect texture, from chewy to crispy․ Perfect for snacks or desserts, these cookies are easy to make and customizable with add-ins like nuts or chocolate chips․ Follow these instructions to create irresistible cocoa wheat cookies with ease!

6․1 Ingredients for Cocoa Wheat Cookies

To make delicious cocoa wheat cookies, you’ll need 1 ½ cups whole wheat flour, ½ cup unsweetened cocoa powder, 1 tsp baking soda, and ¼ tsp salt․ For sweetness, use ¾ cup brown sugar and ¼ cup granulated sugar․ Add ½ cup unsalted butter, 2 large eggs, and 1 tsp vanilla extract․ Optional add-ins include chocolate chips or chopped nuts․ Mix these ingredients for a rich, chocolatey flavor and a wholesome treat!

6․2 Preparing the Cookie Dough

Start by combining 1 ½ cups whole wheat flour, ½ cup unsweetened cocoa powder, 1 tsp baking soda, and ¼ tsp salt in a large bowl․ In a separate bowl, cream ½ cup unsalted butter with ¾ cup brown sugar and ¼ cup granulated sugar until smooth․ Add 2 large eggs and 1 tsp vanilla extract, mixing until well combined․ Gradually mix in the dry ingredients until a dough forms․ Fold in optional chocolate chips or chopped nuts․ Chill the dough for 10 minutes before shaping into cookies․

6․3 Baking Instructions for Cookies

Preheat your oven to 375°F (190°C) and line baking sheets with parchment paper․ Scoop tablespoon-sized dough balls, placing them 3 inches apart․ Bake for 12-14 minutes, or until edges are set․ For chewier cookies, bake until lightly golden; for crispier, bake until darker․ Allow cookies to cool on the sheet for 5 minutes before transferring to a wire rack․ Sprinkle with sea salt or press with a fork for texture while warm․ Let cool completely before storing․

6․4 Cooling and Storing Cookies

After baking, let cookies cool on the baking sheet for 5-10 minutes to set․ Transfer to a wire rack to cool completely․ Store in an airtight container at room temperature for up to 5 days; For longer storage, place in a single layer in a freezer-safe bag and freeze for up to 2 months․ Thaw at room temperature or reheat in the oven for a fresh taste․ Proper cooling prevents sogginess, ensuring cookies stay crisp and flavorful․

Cocoa Wheat Pastries Instructions

Master the art of creating rich, chocolatey pastries with whole wheat․ From flaky dough to decadent fillings, these recipes blend cocoa’s deep flavor with wheat’s nutty goodness, ensuring a treat that’s both indulgent and wholesome․ Perfect for breakfast or dessert, cocoa wheat pastries offer a delightful twist on classic baked goods, combining health and taste effortlessly․ Follow these steps to craft stunning, flavorful pastries that impress every time․

7․1 Ingredients for Cocoa Wheat Pastries

To create delicious cocoa wheat pastries, you’ll need essential ingredients like whole wheat flour, unsweetened cocoa powder, baking powder, salt, and cold butter for the dough․ Add milk or buttermilk for moisture and a touch of sugar for sweetness․ For fillings, consider dark chocolate, nuts, or fruit preserves․ Eggs can be used for brushing dough, enhancing golden color․ Optional additions like vanilla extract or spices can elevate the flavor․ Ensure all ingredients are fresh for the best results in texture and taste․

7․2 Preparing the Pastry Dough

Start by combining whole wheat flour, all-purpose flour, cocoa powder, and salt in a large bowl․ Cut in cold butter until the mixture resembles coarse crumbs․ Gradually add milk or buttermilk, stirring until a dough forms․ Turn the dough onto a floured surface and knead gently until it comes together․ Avoid overworking to maintain flakiness․ Wrap the dough in plastic wrap and chill for at least 30 minutes to relax the gluten․ This step ensures the dough will roll out smoothly for your pastries․

7․3 Baking Instructions for Pastries

Preheat your oven to 375°F (190°C)․ Roll out the chilled cocoa wheat pastry dough to about 1/8 inch thickness․ Cut into desired shapes using a cookie cutter or knife․ Place pastries on a parchment-lined baking sheet, leaving 1 inch of space between each․ Brush tops lightly with milk or beaten egg for a glossy finish․ Bake for 18-20 minutes, or until edges are golden․ Allow pastries to cool on the sheet for 5 minutes, then transfer to a wire rack to cool completely before serving or decorating․

7․4 Serving and Decorating Pastries

Serve cocoa wheat pastries warm or at room temperature for the best flavor․ Dust with powdered sugar or cocoa powder for a simple yet elegant look․ For a richer treat, drizzle with melted chocolate or top with whipped cream․ Add fresh fruit or chopped nuts for extra texture and flavor․ Experiment with creative glazes, like a coffee or vanilla-based icing, to enhance the cocoa wheat taste․ Serve alongside a cup of coffee or tea for a delightful pairing․ Store leftovers in an airtight container to maintain freshness․

Cocoa Wheat Snacks Instructions

Cocoa wheat snacks are delicious and easy to prepare․ Try cocoa-infused granola bars or energy bites․ Combine cocoa powder with whole wheat for a nutritious, flavorful treat perfect for quick bites or on-the-go snacks․

8․1 Ingredients for Cocoa Wheat Snacks

To make delicious cocoa wheat snacks, you’ll need 1 cup of whole wheat flour, 2 tablespoons of unsweetened cocoa powder, and 1/2 cup of rolled oats․ Add 1/4 cup of nuts or seeds for crunch and 1/4 cup of honey or maple syrup for sweetness․ Include 1/4 cup of melted nut butter to bind the mixture․ Optionally, add 1 teaspoon of vanilla extract or a pinch of salt for extra flavor․ These ingredients create a tasty, nutritious base for your snacks․

8․2 Preparing the Snack Mixture

To prepare the snack mixture, start by combining 1 cup of whole wheat flour, 2 tablespoons of cocoa powder, and 1/2 cup of oats in a large bowl․ In a separate bowl, mix 1/4 cup of melted nut butter with 1/4 cup of honey or syrup until smooth․ Pour the wet mixture over the dry ingredients and stir until well combined․ Fold in 1/4 cup of nuts or seeds for added texture․ Mix gently to avoid clumping․ Let the mixture rest for 5 minutes before shaping into desired forms for baking or no-bake options․

8․3 Baking Instructions for Snacks

Preheat your oven to 350°F (175°C)․ Scoop the prepared snack mixture into small balls or press it into a lined baking tray․ Bake for 12-15 minutes, or until lightly browned around the edges․ Allow the snacks to cool slightly on the tray before transferring them to a wire rack to cool completely․ This ensures they retain their shape and texture․ For crispier snacks, bake for an additional 2-3 minutes․ Let cool fully before serving or storing in an airtight container for up to 5 days․

8․4 Serving and Storing Snacks

Allow cocoa wheat snacks to cool completely on a wire rack before serving․ For a sweeter touch, dust with powdered sugar or drizzle with melted chocolate․ Store in an airtight container at room temperature for up to 5 days․ For longer freshness, keep them in the refrigerator for up to 2 weeks or freeze for 2 months․ When serving, pair with a side of fresh fruit or a glass of milk for a delightful snack․ Perfect for on-the-go or as a gift, these snacks are versatile and delicious!

Enhancing Flavor in Cocoa Wheat Recipes

Elevate your baked goods with spices like cinnamon or nutmeg, and incorporate nuts for added texture․ Experiment with brown sugar or honey for depth, making each recipe unique and flavorful, enhancing the cocoa wheat experience․

9․1 Adding Spices and Flavorings

Spices and flavorings can elevate cocoa wheat recipes, adding depth and complexity․ Cinnamon, nutmeg, and cardamom pair beautifully with cocoa, creating a warm, aromatic flavor profile․ Vanilla extract enhances sweetness without overpowering, while espresso powder intensifies chocolate notes․ For a unique twist, try adding a pinch of cayenne pepper for a subtle spicy kick․ Experiment with different combinations to find your perfect blend, ensuring each bake is a delicious, one-of-a-kind creation․ These additions refine the taste, making your treats truly exceptional․

9․2 Incorporating Nuts and Seeds

Incorporating nuts and seeds into cocoa wheat recipes enhances texture, flavor, and nutrition․ Walnuts, almonds, and hazelnuts add a satisfying crunch, while chia seeds and flaxseeds provide a nutty flavor and extra fiber․ Toasting nuts before adding them intensifies their aroma and taste․ For a nutritious boost, try mixing in sunflower seeds or pumpkin seeds․ These additions not only elevate the dish but also contribute to a heartier, more wholesome treat․ Experiment with different combinations to find the perfect balance for your baked goods․

9․3 Using Different Types of Sugar

Different sugars add unique flavors and textures to cocoa wheat recipes․ Light brown sugar enhances moisture with a caramel-like taste, while Demerara offers a crunchy topping․ Honey and maple syrup provide distinct sweetness and flavor profiles․ Coconut sugar adds a subtle, earthy note․ When substituting sugars, consider their impact on texture and browning․ For example, refined sugars promote crispiness, while natural sugars add chewiness․ Experiment with combinations to create depth, ensuring the sugar complements the cocoa without overpowering it․ Adjust liquid content as needed for optimal results․

Troubleshooting Common Issues

Troubleshoot common cocoa wheat baking problems like dense textures or dryness by adjusting ingredient ratios or hydration levels․ Fix overmixing by ensuring gentle folding․ Prevent sinking by not overbaking․ Ensure accuracy in measurements for best results․

10․1 Common Mistakes in Cocoa Wheat Baking

Common mistakes in cocoa wheat baking include overmixing the dough, which can lead to a dense texture, and using incorrect measurements, resulting in imbalanced flavors․ Overbaking is another issue, causing dryness․ Ensure accurate measurements and avoid overmixing to maintain moisture and texture․ Incorrect oven temperature or insufficient hydration can also affect the final product․ Pay attention to ingredient ratios to achieve the perfect balance of cocoa and wheat flavors in your baked goods․

10․2 Fixing Overly Dense or Dry Textures

To address overly dense or dry textures in cocoa wheat baking, ensure accurate measurements and avoid overmixing, which can develop excess gluten․ Use a scale for precise flour measurement and gently fold wet and dry ingredients․ Increase liquid content if cocoa powder absorbs too much moisture, and adjust baking time to prevent overcooking; Incorporating additional fat or ingredients like yogurt can enhance moisture․ Adjusting the cocoa-to-wheat ratio and ensuring proper hydration will help achieve a lighter, more tender texture․

10․3 Adjusting Ingredient Ratios

Adjusting ingredient ratios in cocoa wheat recipes ensures balance and texture․ If the batter is too thick, add a little more liquid․ For a richer cocoa flavor, increase cocoa powder slightly but maintain the flour ratio․ Too much flour can make the texture dry, so reduce it if needed․ Ensure leavening agents like baking powder align with the batter volume․ Experimenting with ratios while keeping proportions balanced will yield better results․ Always measure ingredients accurately to avoid discrepancies․

Byjacquelyn

list of eye diseases with pictures pdf

Eye diseases encompass various conditions affecting vision and eye health, such as cataracts, glaucoma, and macular degeneration. Visual aids like images and diagrams play a crucial role in early diagnosis and understanding these disorders, enabling effective management and treatment strategies for patients worldwide.

Overview of Common Eye Diseases

Common eye diseases vary in severity and impact, ranging from temporary discomfort to permanent vision loss. Conditions like cataracts, glaucoma, and macular degeneration are prevalent, affecting millions worldwide. These diseases often target specific parts of the eye, such as the lens, optic nerve, or retina, leading to symptoms like blurred vision, eye pain, or sensitivity to light. Early detection is critical, as many of these conditions can be managed or treated effectively if diagnosed promptly. Resources like “A List of Eye Diseases with Pictures PDF” provide visual guidance, helping individuals and professionals identify signs and understand the progression of these disorders. Such tools emphasize the importance of regular eye exams and awareness in maintaining eye health.

The Importance of Visual Aids in Diagnosis

Visual aids, such as images and diagrams, are essential in the diagnosis and understanding of eye diseases. They provide a clear and detailed representation of conditions like cataracts, glaucoma, and macular degeneration, helping both patients and professionals identify symptoms. Resources like “A List of Eye Diseases with Pictures PDF” offer comprehensive visual guides, enabling early detection and accurate diagnosis. These tools bridge communication gaps, making complex medical information accessible. By illustrating the progression of diseases, visual aids empower individuals to recognize early warning signs, fostering timely medical interventions. Their role in education and awareness cannot be overstated, as they simplify the understanding of ocular health and promote proactive care.

Common Eye Diseases

Eye diseases vary widely, including cataracts, glaucoma, macular degeneration, keratoconus, retinal detachment, diabetic retinopathy, and conjunctivitis. Each condition affects different parts of the eye, requiring tailored approaches for diagnosis and treatment.

Cataracts

Cataracts are a clouding of the eye’s lens, leading to vision impairment. They often develop with age but can also result from trauma, medications, or congenital conditions. Symptoms include blurry vision, sensitivity to glare, and difficulty seeing at night. If left untreated, cataracts can significantly impact daily activities. Diagnosis involves a comprehensive eye exam, including visual acuity tests and slit-lamp examinations. Treatment typically involves surgical removal of the cloudy lens, which is then replaced with an artificial intraocular lens (IOL). Early detection is crucial for preserving vision, as cataracts progress gradually over time. Regular eye exams are recommended to monitor their development and plan appropriate interventions.

Glaucoma

Glaucoma is a group of eye diseases that damage the optic nerve, often due to increased intraocular pressure. It can lead to vision loss if untreated. There are two main types: open-angle glaucoma, which develops gradually, and angle-closure glaucoma, which can cause sudden symptoms like severe eye pain and blurred vision. Risk factors include age, family history, and medical conditions like diabetes. Early detection through tonometry and optical coherence tomography (OCT) is critical. Treatment options include eye drops, oral medications, laser therapy, and surgery to reduce pressure and prevent further damage. Regular eye exams are essential for early diagnosis and managing this condition effectively.

Macular Degeneration

Macular degeneration, also known as age-related macular degeneration (AMD), is a leading cause of vision loss in older adults. It affects the macula, the central part of the retina responsible for sharp, detailed vision. Symptoms include distorted or blurry vision, difficulty reading, and blind spots in the visual field. There are two forms: dry AMD, the more common type, and wet AMD, which is caused by abnormal blood vessel growth under the retina. Risk factors include age, smoking, and genetics. Early detection through optical coherence tomography (OCT) and regular eye exams is crucial. While there is no cure, treatments like anti-VEGF injections for wet AMD and lifestyle changes can slow progression. Protecting vision through early diagnosis and management is essential for maintaining quality of life.

Keratoconus

Keratoconus is a progressive eye disease characterized by thinning and bulging of the cornea, leading to distorted vision. It often begins in adolescence or early adulthood, causing blurry or double vision, eye strain, and sensitivity to light. The cornea’s irregular shape prevents light from focusing properly on the retina, resulting in poor visual clarity. Diagnosis involves advanced imaging techniques like corneal topography and OCT scans. Treatment options include corrective eyewear, specialized contact lenses, and procedures such as corneal cross-linking to stabilize the cornea. In severe cases, a corneal transplant may be necessary. Early detection and intervention are critical to managing the condition and preserving vision. Keratoconus highlights the importance of regular eye exams for identifying progressive eye disorders early.

Retinal Detachment

Retinal detachment is a serious eye condition where the retina separates from the back of the eye, potentially leading to permanent vision loss if untreated. Symptoms include sudden flashes of light, increased floaters, and a “curtain” or shadow descending over the visual field. It often results from retinal tears, which can be caused by conditions like diabetic retinopathy, severe myopia, or eye injuries. Diagnosis involves fundoscopic examination and imaging techniques such as OCT scans. Treatment typically requires urgent care, with options ranging from laser therapy to surgical procedures like vitreoretinal surgery. Early intervention is critical to prevent permanent damage and restore vision. Retinal detachment underscores the importance of prompt medical attention for sudden eye symptoms to preserve visual health.

Diabetic Retinopathy

Diabetic retinopathy is a common complication of diabetes, affecting the blood vessels in the retina. It can lead to vision loss if left untreated. Symptoms include blurred vision, floating spots, and difficulty with color perception. The condition progresses through stages, from mild non-proliferative changes to more severe proliferative retinopathy, where abnormal blood vessels grow. Risk factors include poorly controlled blood sugar levels, hypertension, and duration of diabetes. Early detection through comprehensive eye exams, including retinal imaging and OCT scans, is essential. Management involves controlling blood sugar, regular monitoring, and treatments like laser therapy or anti-VEGF injections for advanced cases. Diabetic retinopathy highlights the importance of managing diabetes and scheduling regular eye exams to prevent vision loss.

Conjunctivitis

Conjunctivitis, often referred to as “pink eye,” is an inflammation or infection of the conjunctiva, the clear membrane covering the white part of the eye and the inner eyelids. It can be caused by viruses, bacteria, allergens, or irritants. Symptoms include redness, itching, burning, discharge, and blurred vision. Viral conjunctivitis is highly contagious and often accompanied by a watery discharge, while bacterial conjunctivitis produces a thicker, pus-like discharge. Allergic conjunctivitis is typically associated with seasonal allergies or specific irritants. Treatment depends on the cause, with viral cases resolving on their own, bacterial cases requiring antibiotics, and allergic cases managed with anti-allergy medications. Proper hygiene, such as avoiding eye contact and washing hands, is essential to prevent the spread of contagious forms.

Symptoms and Signs

Common symptoms include redness, vision changes, itching, and eye discomfort. Recognizing these signs early can help distinguish between acute and chronic conditions, ensuring timely intervention and better outcomes.

Recognizing Early Warning Signs

Early detection of eye diseases is crucial for effective treatment. Common warning signs include sudden vision changes, flashes of light, or floaters, which may indicate retinal detachment. Blurred vision, eye pain, or sensitivity to light can signal conditions like glaucoma or optic neuritis. Redness, itching, or discharge may point to infections such as conjunctivitis or keratitis. Patients should monitor for unusual symptoms and seek immediate medical attention if they experience persistent or severe issues. Regular eye exams can identify asymptomatic conditions like diabetic retinopathy or macular degeneration in their early stages. Timely intervention can prevent vision loss and improve outcomes, emphasizing the importance of vigilance and proactive healthcare.

Distinguishing Between Acute and Chronic Conditions

Acute eye conditions develop suddenly and typically require immediate attention, such as retinal detachment or optic neuritis, which can cause severe vision loss if untreated. Chronic conditions, like glaucoma or macular degeneration, progress slowly over time and may not show symptoms in early stages. Acute issues often present with pain, redness, or sudden vision changes, while chronic diseases may exhibit gradual blurring or peripheral vision loss. Understanding these differences is vital for timely medical intervention. Early detection through regular exams can help manage chronic conditions, while acute cases demand urgent care to prevent permanent damage. Recognizing these distinctions ensures appropriate treatment and better outcomes for patients.

Diagnosis and Imaging

Advanced imaging techniques, including orbital ultrasound, CT scans, and MRI, are crucial for diagnosing eye diseases. These tools provide detailed visuals of ocular structures, aiding accurate assessments.

Role of Ocular Radiology

Ocular radiology plays a vital role in diagnosing eye diseases by providing detailed imaging of the eye’s internal structures. Modalities like orbital ultrasound, CT scans, and MRI are commonly used to visualize the retina, optic nerve, and orbital tissues. These imaging techniques help identify abnormalities such as retinal detachment, tumors, or inflammatory changes. High-resolution images enable clinicians to assess the extent of damage and guide treatment plans. Radiology is particularly useful for conditions that are difficult to examine externally, such as deep orbital pathologies. By offering a non-invasive way to explore ocular health, radiology enhances diagnostic accuracy and supports effective management of eye diseases.

Advanced Imaging Techniques

Advanced imaging techniques have revolutionized the diagnosis and management of eye diseases, offering unparalleled insights into ocular structures. Optical Coherence Tomography (OCT) provides high-resolution images of the retina and its layers, aiding in the detection of conditions like macular degeneration and diabetic retinopathy. Fundus autofluorescence highlights abnormalities in the retinal pigment epithelium, while ultrasound biomicroscopy visualizes the anterior segment. These tools complement traditional methods like MRI and CT scans, enabling detailed cross-sectional views of orbital and ocular pathologies. By enhancing diagnostic precision, advanced imaging techniques facilitate early intervention and personalized treatment plans, significantly improving patient outcomes in complex eye diseases. These technologies are indispensable in modern ophthalmology, bridging the gap between clinical examination and precise pathological diagnosis.

Prevention and Management

Preventing eye diseases involves regular exams, protective eyewear, and managing health conditions like diabetes. Lifestyle changes, such as balanced diets and avoiding smoking, reduce risks. Timely medical interventions and adherence to treatment plans are essential for effective management of eye disorders, ensuring optimal vision preservation and quality of life.

Lifestyle Modifications

Lifestyle modifications play a crucial role in preventing and managing eye diseases. A balanced diet rich in fruits, vegetables, and nutrients like lutein and zeaxanthin can protect eye health. Regular physical activity helps maintain a healthy weight, reducing the risk of conditions like glaucoma. Avoiding smoking and limiting exposure to harmful environments are essential for preserving vision. Protecting eyes from UV rays with sunglasses and following proper hygiene practices can prevent infections. Additionally, staying hydrated and managing stress contribute to overall eye wellness. Regular eye exams ensure early detection of potential issues, allowing for timely interventions. By adopting these habits, individuals can significantly reduce the risk of developing eye diseases and maintain optimal vision throughout their lives.

Medical and Surgical Interventions

Medical and surgical interventions are critical for treating various eye diseases. Medications, such as eye drops for glaucoma or anti-VEGF injections for macular degeneration, can manage symptoms and slow disease progression. Surgical options, including cataract removal, corneal transplants, or retinal detachment repair, restore vision and prevent further damage. Laser therapy is often used to treat conditions like diabetic retinopathy or glaucoma, reducing intraocular pressure. Advanced imaging techniques guide precise surgical interventions, ensuring optimal outcomes. Early diagnosis and tailored treatment plans are essential for preserving vision and improving quality of life for patients with eye diseases. These interventions highlight the importance of modern ophthalmology in addressing complex eye conditions effectively.

Regular eye exams are vital for early detection and management of eye diseases, ensuring timely interventions and preserving vision. They play a crucial role in maintaining eye health and quality of life for individuals worldwide.

The Importance of Regular Eye Exams

Regular eye exams are essential for maintaining healthy vision and detecting potential issues early. They allow eye care professionals to identify signs of conditions like cataracts, glaucoma, and diabetic retinopathy before symptoms arise. Advanced imaging techniques, such as ocular radiology and retinal scans, provide detailed insights into eye health. These exams are particularly crucial for individuals with risk factors like diabetes, hypertension, or a family history of eye diseases. Early detection often leads to more effective treatment outcomes, preventing vision loss. Regular check-ups also ensure that corrective measures, such as glasses or contact lenses, are up-to-date. By prioritizing eye exams, individuals can safeguard their vision and overall quality of life, emphasizing the critical role of preventive care in eye health management.